The 17-Year-Old Truth: Difference between revisions
No edit summary |
|||
| (56 intermediate revisions by 8 users not shown) | |||
| Line 4: | Line 4: | ||
| image = TV Episode 1164-1167.jpg | | image = TV Episode 1164-1167.jpg | ||
| title = {{PAGENAME}} <br> 1164 The Bloody Knight <br> 1165 The Perceptive Devil <br> 1166 The Far-Sighted Bishop <br> 1167 The Queen's Gambit | | title = {{PAGENAME}} <br> 1164 The Bloody Knight <br> 1165 The Perceptive Devil <br> 1166 The Far-Sighted Bishop <br> 1167 The Queen's Gambit | ||
| japanese-title = {{lang|ja| | | japanese-title = {{lang|ja|{{ruby|17|じゅうなな}}年前の真相}} <br> (Jūnana-nen Mae no Shinsō) <br> 1164 {{nihongo|血染めの{{ruby|騎士|ナイト}}|Chizome no Naito}} <br> 1165 {{nihongo|達眼の悪魔|Tatsugan no Akuma}} <br> 1166 {{nihongo|遠見の角行|Tōmi no Kakugyō}} <br> 1167 {{nihongo|{{ruby|女王の謀|クイーンズ・ギャンビット}}|Kuīnzu Gyanbitto}} | ||
| rating = 5.4% (The Bloody Knight) <br> 6.2% (The Perceptive Devil) <br> 4.8% (The Far-Sighted Bishop) | | rating = 5.4% (The Bloody Knight) <br> 6.2% (The Perceptive Devil) <br> 4.8% (The Far-Sighted Bishop) <br> 5.2% (The Queen's Gambit) | ||
| Manga case number = #318 <br> #319 | | Manga case number = #318 <br> #319 | ||
| airdate = June 7, 2025 (The Bloody Knight) <br> June 14, 2025 (The Perceptive Devil) <br> June 21, 2025 (The Far-Sighted Bishop) <br> June 28, 2025 (The Queen's Gambit) | | airdate = June 7, 2025 (The Bloody Knight) <br> June 14, 2025 (The Perceptive Devil) <br> June 21, 2025 (The Far-Sighted Bishop) <br> June 28, 2025 (The Queen's Gambit) | ||
| Line 13: | Line 13: | ||
| dubbed-episode = | | dubbed-episode = | ||
| english-airdate = | | english-airdate = | ||
| cast = [[Conan Edogawa]] <br> [[Ran Mouri]] <br> [[Kogoro Mouri]] <br> [[Ai Haibara]] <br> [[Mitsuhiko Tsuburaya]] <br> [[Ayumi Yoshida]] <br> [[Genta Kojima]] <br> [[Sumiko Kobayashi]] <br> [[Rumi Wakasa]] <br> [[Ninzaburo Shiratori]] <br> [[Hyoue Kuroda]] <br> [[Kanenori Wakita]] <br> [[Juzo Megure]] <br> [[Rum]] <br> [[Hiroshi Agasa]] <br> [[Chianti]] <br> [[Korn]] <br> [[Shuichi Akai]] <br> [[Amanda Hughes]] <br> [[Rachel Asaka]] <br> [[Kohji Haneda]] <br> [[Tsutomu Akai]] <br> [[Mary Sera]] <br> [[Shukichi Haneda]] | | cast = [[Conan Edogawa]] <br> [[Ran Mouri]] <br> [[Kogoro Mouri]] <br> [[Ai Haibara]] <br> [[Mitsuhiko Tsuburaya]] <br> [[Ayumi Yoshida]] <br> [[Genta Kojima]] <br> [[Sumiko Kobayashi]] <br> [[Rumi Wakasa]] <br> [[Ninzaburo Shiratori]] <br> [[Hyoue Kuroda]] <br> [[Kanenori Wakita]] <br> [[Juzo Megure]] <br> [[Rum]] <br> [[Hiroshi Agasa]] <br> [[Chianti]] <br> [[Korn]] <br> [[Shuichi Akai]] <br> [[Amanda Hughes]] <br> [[Rachel Asaka]] <br> [[Kohji Haneda]] <br> [[Tsutomu Akai]] <br> [[Mary Sera]] <br> [[Shukichi Haneda]] <br> [[Subaru Okiya]] <br> [[Kamen Yaiba]] | ||
| solved-by = [[Conan Edogawa]] | | solved-by = [[Conan Edogawa]] (x2) | ||
| next-conan-hint = Crossword puzzles (The Bloody Knight) <br> Glasses case (The Perceptive Devil) <br> Knight (The Far-Sighted Bishop) <br> Umbrella (The Queen's Gambit) | | next-conan-hint = Crossword puzzles (The Bloody Knight) <br> Glasses case (The Perceptive Devil) <br> Knight (The Far-Sighted Bishop) <br> Umbrella (The Queen's Gambit) | ||
| case = | | case = | ||
| Line 28: | Line 28: | ||
| closing-song = Fun! Fun! Fun! | | closing-song = Fun! Fun! Fun! | ||
| prev-episode = The Counting Song Heard in the Dark | | prev-episode = The Counting Song Heard in the Dark | ||
| next-episode = | | next-episode = Genta's Casebook of the Eel | ||
| footnotes = | | footnotes = | ||
}} | |||
{{nihongo|'''''{{PAGENAME}}'''''| | {{nihongo|'''''{{PAGENAME}}'''''|{{ruby|17|じゅうなな}}年前の真相|Jūnana-nen Mae no Shinsō}} is the 1164th, 1165th, 1166th and 1167th episode of the ''[[Detective Conan]]'' [[anime]]. | ||
== Characters introduced == | == Characters introduced == | ||
<spoiler> | |||
{{BeginBox}} | {{BeginBox}} | ||
{{NewChar|[[Rachel Asaka]]|Rachel Asaka.jpg| | {{NewChar|[[Rachel Asaka]]|Rachel Asaka.jpg| | ||
| Line 39: | Line 40: | ||
* Rumi Wakasa's real identity}} | * Rumi Wakasa's real identity}} | ||
{{EndBox}} | {{EndBox}} | ||
</spoiler> | |||
== Cast == | == Cast == | ||
| Line 67: | Line 69: | ||
{{Char|Mary Sera|display=Mary Akai (flashback)}} | {{Char|Mary Sera|display=Mary Akai (flashback)}} | ||
{{Char|Shukichi Haneda|display=Shukichi Haneda (flashback)}} | {{Char|Shukichi Haneda|display=Shukichi Haneda (flashback)}} | ||
{{Char|Subaru Okiya|display=Subaru Okiya (background flashback)}} | |||
{{Char|Kamen Yaiba|display=Kamen Yaiba (statue background flashback)}} | |||
}} | }} | ||
== Case == | == Case 1: Chess Tournament Murder == | ||
=== Situation === | === Situation === | ||
==== The Bloody Knight ==== | ==== The Bloody Knight ==== | ||
On a rainy day, Kogoro decides to reward himself with sushi from Iroha Sushi after gaining lots of money from the investigation. While Ran goes out for some tea leaves, Wakita wonders where Conan could be. Kogoro reveals that he will be cheering for Shiratori, who is going to compete in a chess tournament at Nishitopia building, with Haibara, the Detective Boys, Kobayashi, and Rumi. | |||
At that building, after Kobayashi gives Shiratori a knight keychain as the lucky charm, the kids begin discussing what piece is the strongest. And once again, Haibara gets teased as her knowledge is just outstanding compared to those of her age, Conan then has to explain that Agasa was the reason why Haibara knows so much about chess and other knowledge. Later, the group meets up with other tournament participants, including Kurumi Shiroi, Kinji Ogarawa, Naoto Kishitami and Kunikazu Kisaki, with each of them having their own chess piece as a lucky charm. Ogawara mentions that a chess player named Ryoichiro Saso used Amazing Grace as his phone tune, only to be betrayed by the tune itself. | |||
In the tournament, Shiratori faces Kuroda but suddenly someone’s phone rings, causing Shiratori to be distracted and he is then declared lost. However, when the two meet up with Kobayashi’s group, Shiratori loses his lucky charm somewhere, so he has to go back to the tournament to find it. Kuroda then greets Kobayashi and Rumi, he also mentions that he had met Rumi somewhere, even before the event of the burning tent murder case, in which she denies. | In the tournament, Shiratori faces Kuroda but suddenly someone’s phone rings, causing Shiratori to be distracted and he is then declared lost. However, when the two meet up with Kobayashi’s group, Shiratori loses his lucky charm somewhere, so he has to go back to the tournament to find it. Kuroda then greets Kobayashi and Rumi, he also mentions that he had met Rumi somewhere, even before the event of the burning tent murder case, in which she denies. | ||
Shiroi, Ogawara and Kunikazu are walking to the waiting room when they hear a strange sound, which would remind them of the ringtone played in the match. Later, Ogawara’s glass suddenly breaks when he is going to have his drink, which makes him scream in fear. Apparently, an arrow has flown through his glass and hit his bag at an almost perfect angle. Conan and Kuroda then try to find the culprit’s trace following the open door, and when they pass by a “cleaning up” sign that looks different than those they have just seen earlier in the restroom, Conan opens a restroom and sees Kishitani’s corpse with several arrows in his body. There are also some items near the scene: | |||
* A crossbow that could have been used to perform the murder. | |||
* A magazine that could leave some clue, because of its weird blood stain. | |||
* A knight keychain that Conan confirms belongs to Shiratori. | |||
{{InfoBox Crime | {{InfoBox Crime | ||
| image = EP1164-1167 Case1.jpg | | image = EP1164-1167 Case1.jpg | ||
| Line 88: | Line 98: | ||
}} | }} | ||
Kuroda informs | Kuroda informs Shiratori about the murder scene and that Shiratori is also a suspect. Shiratori agrees with this while trying to provide an alibi, as: | ||
* He was in one of the restrooms to just find the missing lucky charm, but he did not see any cleaning up sign. | |||
* He was in the stairs near that restroom area to find the charm, as he might have dropped it there when he was making a call to his butler to inform him about the result. In addition, he did not see anyone walking by when making the call. | |||
The police arrive and Megure begins listening to their report about the incident, he then deduces that the culprit must have escaped. Conan denies this and thinks that there are still 4 people in the building that could shoot Kishitani: Shiroi, Ogawara, Kunikazu and Shiratori, as following him and Kuroda, no one got in or out of the building. Megure wonders couldn’t Kishitani have killed himself, to which Kuroda explains why it couldn't be. Kunizaku expresses that something is wrong when the police trust a boy like Conan, Kuroda points out that his jacket seems to have a strange tear. Shiroi mentions that they heard a strange sound after returning from the match, and when they return to the place they heard the sound, an arrow is seen stuck in the wall. | |||
The | The police ask what the suspects had done after leaving the match: | ||
* Kunikazu was buying drinks in the vending machine after he left the match with the victim when Shiroi and Ogawara showed up. After hearing the strange noise, he just played game until the glass broke | |||
* Kishitani received a message when he was buying drinks like Kunikazu, the message frightened him so he ran away somewhere. | |||
* Shiroi was going along with Ogawara until she went to the bathroom to see the match again with earphones, so she didn’t notice much noise outside. | |||
* Ogawara says that he also used the restroom when he separated from Shiroi. He noticed one of the toilets but didn’t know it was Kishitani. After using the restroom, he went to the waiting room with others. | |||
When Megure takes the charm out, Conan can finally see the bloodstained side of it, this reminds both Wakasa and Kuroda of something long ago while Conan is deducing. Megure also states that there is a bloodstained crossword page, indicating that the victim may have left his last word there. The Detective Boys and Haibara mention that there were 2 glass boxes in the trash bin, one with nothing, one with shattered glasses. Conan then smiles, indicating that he knows the truth behind. | When Megure takes the charm out, Conan can finally see the bloodstained side of it, this reminds both Wakasa and Kuroda of something long ago while Conan is deducing. Megure also states that there is a bloodstained crossword page, indicating that the victim may have left his last word there. The Detective Boys and Haibara mention that there were 2 glass boxes in the trash bin, one with nothing, one with shattered glasses. Conan then smiles, indicating that he knows the truth behind. | ||
Outside the building, Rum is seen smiling in his car with his cigarette. | Outside the building, Rum is seen smiling in his car with his cigarette. | ||
==== The Perceptive Devil ==== | ==== The Perceptive Devil ==== | ||
Conan calls Agasa to ask how long it takes for him to bring the item, he answers that he has completed the requested item and it’ll need 10 minutes to get there as well. While at | Conan calls Agasa to ask how long it takes for him to bring the item, he answers that he has completed the requested item and it’ll need 10 minutes to get there as well. While at the building, Ogawara asks if the three of them are out of the suspicious range, with Kisaki and Shiroi thinking that the culprit must be Shiratori. The Detective Boys and Haibara justify that he can’t be that kind of person, even though he has curly hair, which makes Shiratori speechless. Conan begins his deduction. | ||
=== People === | |||
{{BeginBox}} | |||
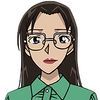
{{People|Kurumi Shiroi|Kurumi Shiroi.jpg| | |||
* 31 years old | |||
* Chess tournament participant}} | |||
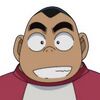
{{People|Kinji Ogawara|Kinji Ogawara.jpg| | |||
* 37 years old | |||
* Chess tournament participant}} | |||
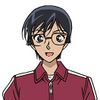
{{People|Naoto Kishitani|Naoto Kishitani.jpg| | |||
* Victim (arrow shot) | |||
* 32 years old | |||
* Chess tournament participant}} | |||
{{People|Kunikazu Kisaki|Kunikazu Kisaki.jpg| | |||
* 34 years old | |||
* Chess tournament participant}} | |||
{{People|Ryoichiro Saso|Ryoichiro Saso.jpg| | |||
* Deceased | |||
* Chess player}} | |||
{{EndBox}} | |||
=== Resolution === | |||
<spoiler> | <spoiler> | ||
==== Victim's final word ==== | |||
Perhap with the knight keychain and when he was murdered by the culprit, he used his brought along magazine and the keychain for his final word, with the bloodstained page acting as the chess board. | |||
Perhap with the knight keychain and when he was murdered by the culprit, he used his brought along magazine and the keychain for his final word, with the bloodstained page acting as the chess board. | |||
Kishitani has a habit of always turning the knight towards him, while the blood stains on the pages of the aforementioned magazine were from both queens; meaning the knight from the queen side had gone to the opponent side, pointing that the bloody handprints is in the king side, while “king side” in Japanese means ousama no gawa or ogawa, meaning that he wanted to say '''Kinji Ogawara''' is the culprit. | |||
==== The trick Ogawara used ==== | |||
==== | |||
Agasa comes and speaks about Ogawara’s broken glass trick. | Agasa comes and speaks about Ogawara’s broken glass trick. | ||
Conan continues, first he had his pen with a small hole, then he prepared two glass boxes, each with one Rupert’s drop, in case one is broken; then he shot an arrow that is separable between the body and the arrowhead; finally, he took one drop to the glass with drink and used the pen to break all together, faking that someone had performed a shot to his glass and hit his bag. | Conan continues, first he had his pen with a small hole, then he prepared two glass boxes, each with one Rupert’s drop, in case one is broken; then he shot an arrow that is separable between the body and the arrowhead; finally, he took one drop to the glass with drink and used the pen to break all together, faking that someone had performed a shot to his glass and hit his bag. | ||
Kuroda deduces that Ogawara shot at the vending machine early | Kuroda deduces that: | ||
# Ogawara shot at the vending machine early. | |||
# He tried to end the match with Shiroi early. | |||
# After he met with others, he sent a message to Kishitani to meet him in the restroom and tore Kunikazu’s jacket. | |||
# Next, he put out a fake “cleaning up” sign, killed the victim, and then return to the waiting room with others. | |||
==== Motive ==== | |||
When Ogawara tuned in “Amazing Grace” in the window, only Kishitani looked at his bag until the song stopped, meaning that it was Kishitani’s phone that rang one year ago made Ryoichiyo Saso panic, so he tried to see if it was his phone or not but the song stopped. Even though he was allowed to continue, but others kept suspect him, he eventually committed suicide with a note that the ringtone was not him. It turns out that Saso was just trying to help Kishitani feel calm, but the latter didn’t think like that as he just wanted Saso to feel scared like him. | When Ogawara tuned in “Amazing Grace” in the window, only Kishitani looked at his bag until the song stopped, meaning that it was Kishitani’s phone that rang one year ago made Ryoichiyo Saso panic, so he tried to see if it was his phone or not but the song stopped. Even though he was allowed to continue, but others kept suspect him, he eventually committed suicide with a note that the ringtone was not him. It turns out that Saso was just trying to help Kishitani feel calm, but the latter didn’t think like that as he just wanted Saso to feel scared like him. | ||
{{InfoBox Crime | {{InfoBox Crime | ||
| crime = Suicide (past) | | crime = Suicide (past) | ||
| Line 122: | Line 165: | ||
| cause-death = Hanging | | cause-death = Hanging | ||
| description = | | description = | ||
}}</spoiler> | }} | ||
</spoiler> | |||
After the case is over, it is revealed that Kuroda was the one to let Agasa in, as he entrusted | == Case 2: The Case 17 Years Ago == | ||
=== Situation === | |||
==== The Perceptive Devil ==== | |||
After the case is over, it is revealed that Kuroda was the one to let Agasa in, as he entrusted Conan to have Agasa in after hearing Conan say that he and Agasa would demonstrate an experiment that would help solve the case. Ayumi suggests that she, other friends, the teachers, and Agasa go to a family restaurant, Kobayashi agrees as the tournament is now cancelled. Kuroda asks the group if he could borrow Conan to have him questioned for a while. Everyone else then decides to go for the second floor for the capsule toy machines, but no one, except Rumi, knows that the security camera has been hacked and controlled to aim at Rumi by Rum and his subordinate, who then send the image of the target to Korn and Chianti. | |||
In a room where Conan and Kuroda can talk privately, Kuroda gives the boy the picture showing the dying message left by an American VIP who was assassinated 17 years ago, which means that the case Kuroda is going to ask Conan coincides with one he has been following with Subaru Okiya. Kuroda begins telling him in detail what happened and why he was there… | |||
Seventeen years ago, Kuroda was having drinks with a friend of his that was living in the U.S and they were discussing the upcoming chess tournament that Kuroda invited the friend to. During the drinking, they happened to see Haneda Kohji, and after the drinking, they saw Amanda Hughes with her bodyguard walk pass by. Amanda then was seen having a friendly chess match with Haneda while the bodyguard, revealed to be Rachel Asaka, was staring at Haneda when he revealed that she is a type of the woman he loves. He also revealed the temporary condition she has based on just her action. | |||
The scene changes just as Rumi is having the same condition Rachel was having, which makes the kids worry about her wellbeing, she reassures that probably she should have rest, and proceeds to go home. But she accidentally breaks Kobayashi’s parachute, which would force her to suggest to Kobayashi to use Rumi’s one while she has to go home via a taxi. Meanwhile, Korn and Chianti are in another building to ambush the target Rum ordered them to, though the condition to perform the sniping sucks. | |||
====The Far-Sighted Bishop ==== | |||
Continuing the story 17 years ago… | |||
Possessing excellent memory, Rum accurately identifies all bodyguards seen with Amanda and orders his people to capture and incapacitate them. | Possessing excellent memory, Rum accurately identifies all bodyguards seen with Amanda and orders his people to capture and incapacitate them. | ||
{{InfoBox Crime | {{InfoBox Crime | ||
| crime = Assault and kidnapping | | crime = Assault and kidnapping | ||
| Line 134: | Line 191: | ||
| victim = Amanda's bodyguards | | victim = Amanda's bodyguards | ||
| victim-label = Victims | | victim-label = Victims | ||
| age = | | age = | ||
| cause-death = Shocking | | cause-death = Shocking | ||
| cause-death-label = Injury | | cause-death-label = Injury | ||
| Line 141: | Line 198: | ||
| description = | | description = | ||
}} | }} | ||
Rum also notes that a Japanese man he saw is also a person of interest and orders his agents to also take care of him. However, when attacked, Kuroda is able to take them both down. | Rum also notes that a Japanese man he saw is also a person of interest and orders his agents to also take care of him. However, when attacked, Kuroda is able to take them both down. | ||
{{InfoBox Crime | {{InfoBox Crime | ||
| crime = Attempted assault | | crime = Attempted assault | ||
| Line 147: | Line 206: | ||
| location = Juke Hotel, [[Setting/Countries|USA]] | | location = Juke Hotel, [[Setting/Countries|USA]] | ||
| victim = Hyoue Kuroda | | victim = Hyoue Kuroda | ||
| cause-death = Shocking | |||
| cause-death-label = Attack Types | |||
| age = 33 years old | | age = 33 years old | ||
| suspects = Rum's agents | | suspects = Rum's agents | ||
| Line 152: | Line 213: | ||
| description = | | description = | ||
}} | }} | ||
Kuroda begins worrying about Amanda's well-being, so he tries to have her room's number via a receptionist, but fails. | |||
Meanwhile, having noticed that Rum and his agents are outside the door, Amanda sends Rachel to Haneda's room to retrieve a knight from her chess set to keep her away from the encounter. When Rum comes into the room, he explains that now that they know Rachel is like a daughter to Amanda, the organisation can use that information and now recruit and force her to help them. Rum presents the APTX 4869 pill to Amanda, showing the alternative, but in an unexpected moment, Amanda voluntarily jumps forward and ingests the pill. | |||
{{InfoBox Crime | {{InfoBox Crime | ||
| crime = Suicide | | crime = Suicide | ||
| Line 162: | Line 227: | ||
| description = | | description = | ||
}} | }} | ||
After Rachel reaches Haneda's room, Haneda reveals that Amanda likely sent her away on a wild goose chase on purpose, as there is no way that someone would miss the fact that a knight was missing from the chess case because of the specially designed crevices for each piece. Haneda tells Rachel to hide when Rum and his agents knock on Haneda's door, asking if they have seen a Japanese woman. Haneda says no and swiftly shuts the door. He then goes on to taser Rachel and hide her in the bookcase in his room. Rum then comes back again and notices that the order of the books has slightly changed from before and, knowing that Rachel is hidden in there, reaches out to remove the books. Before | |||
After Rachel reaches Haneda's room, Haneda reveals that Amanda likely sent her away on a wild goose chase on purpose, as there is no way that someone would miss the fact that a knight was missing from the chess case because of the specially designed crevices for each piece. Haneda tells Rachel to hide when Rum and his agents knock on Haneda's door, asking if they have seen a Japanese woman. Haneda says no and swiftly shuts the door. He then goes on to taser Rachel and hide her in the bookcase in his room. Rum then comes back again and notices that the order of the books has slightly changed from before and, knowing that Rachel is hidden in there, reaches out to remove the books. | |||
At the same time, when Kuroda accidentally knows the room Amanda is staying following a bellhop, Amanda's body is discovered. Kuroda orders the bellhop to call the police while Kuroda examines the scene. He realises that the special guest Haneda said he was going to play chess with was in fact Amanda, so, sensing something is off, he requests the bellhop for the room of Haneda, but will it be in time? | |||
Before Rum gets the chance to remove the books, Haneda drops his act and tells Rum he remembers seeing him in the news. Haneda is then repeatedly beaten and eventually fed the APTX 4869 pill as the police are arriving due to. Before he dies, he leaves a final message by cutting up a mirror with the text "Put on mascara". | |||
{{InfoBox Crime | {{InfoBox Crime | ||
| crime = Murder | | crime = Murder | ||
| Line 174: | Line 245: | ||
| description = | | description = | ||
}} | }} | ||
Kuroda again arrives not in time, as Haneda is also dead in a really messy scene. At this time, Rachel wakes up and, under the assumption Kuroda killed Haneda, begins attacking him. Having no choice after she breaks some of his ribs, he takes Rachel down In a moment of shock when she sees a photo of Amanda's corpse on a phone. | |||
==== The Queen's Gambit ==== | ==== The Queen's Gambit ==== | ||
Rum and his agents outside the hotel see chess notes flying out of the hotel, and Rum deduces that Rachel will be snuck out of the hotel using the bookcase again. However, as they reach Haneda's floor, Kuroda, wheeling a suitcase with Rachel in it, manages to sneak by. After Rum realises that Rachel was in the suitcase, he and his agents get in his car and begin chasing Kuroda's vehicle. However, Kuroda's car ends up being ran into by a truck and his car catches on fire. Seeing the commotion, Rum decides to step away. | |||
{{InfoBox Crime | {{InfoBox Crime | ||
| crime = Accident | | crime = Accident | ||
| Line 189: | Line 263: | ||
In his last moments of consciousness, Kuroda asks an EMT about how the female in his car was, and the EMT says that only he was found, suggesting Rachel escaped before the ambulance got there. | In his last moments of consciousness, Kuroda asks an EMT about how the female in his car was, and the EMT says that only he was found, suggesting Rachel escaped before the ambulance got there. | ||
Back in the modern day, | Back in the modern day, Conan is ready to tell his deciphering process about Amanda’s final word; while Agasa, Kobayashi, and the children are impatient that 40 minutes have passed and Conan hasn’t returned, with Kobayashi hoping that Rumi does not soak herself wet. It is partially true as she is standing on the rooftop of another building other than one of the kids and the snipers for something. Rum is regretting not killing them earlier and has to wait til now when Chianti suddenly laughs as some assumed idiot tried to commit a robbery with just a knife. | ||
Chianti | |||
{{InfoBox Crime | {{InfoBox Crime | ||
| crime = | | crime = Robbery | ||
| image = | | image = | ||
| location = Unknown | | location = Unknown store, Tokyo | ||
| suspects = | | suspects = Unknown | ||
| suspects-label = Culprit | | suspects-label = Culprit | ||
| description = | | cause-death = A knife | ||
| cause-death-label = Method | |||
| description = The news makes Chianti laughs as she assumes that the person performing this with just a knife is an idiot. | |||
}} | }} | ||
=== People (flashback to 17 years ago) === | |||
{{BeginBox}} | {{BeginBox}} | ||
{{People|Man A|E1166 man.jpg| | {{People|Man A|E1166 man.jpg| | ||
* Kuroda's drinking buddy}} | * Kuroda's drinking buddy | ||
* One of Kuroda's friends}} | |||
{{People|Man B|E1166 bodyguard.jpg| | {{People|Man B|E1166 bodyguard.jpg| | ||
* Amanda's bodyguard at the Monaco Grand Prix}} | * Amanda's bodyguard at the Monaco Grand Prix}} | ||
| Line 317: | Line 349: | ||
=== Resolution === | === Resolution === | ||
<spoiler> | <spoiler> | ||
==== | ==== Conan's deduction ==== | ||
The | Back to the private talk, Conan reveals that the kiss mark on the watch that has the knight is missing both ends, suggesting us to cut both ends of either LIPS or MOUTH: | ||
* Doing that on LIPS gives IP, an internet term that might be unrelated. | |||
* Doing that on MOUTH gives '''out''', when combined with the item Watch, it means: '''Watch out!''' | |||
Conan needs help from Kuroda as the boy couldn’t figure out who to watch out for, even with the kiss mark on both eyes of the horse. Kuroda then recalls having seen someone wearing a monocle with the eye of a snake. That could be the person Amanda was referring to. | |||
The two then confirm that '''Rumi Wakasa''' was the missing bodyguard 17 years ago, as she is always glaring at him every time they meet each other as if he was the one to kill Amanda and Haneda. | |||
==== An attempted murder ==== | |||
Conan suggests having calls with Rumi directly despite the risk of her refusing to reveal anything, only to notice that he has missed calls from Agasa and has to ask Kuroda for a moment. However, Conan is not able to have Agasa give the phone to Rumi as she left some time ago, and upon noticing the abnormalities, he tries to warn them not to come out of the building, but his phone’s battery ends at the worst moment possible. | |||
At the last second, Rum notices that the '''boots''' of the target did not match Rumi's and ends up calling off the shot but not before two bullets are fired. | |||
{{InfoBox Crime | |||
| crime = Attempted murder | |||
| image = EP1164-1167 Case8.jpg | |||
| location = [[wikipedia:Japan National Route 122|Kitahon Street]] | |||
| victim = Sumiko Kobayashi | |||
| age = 26 years old | |||
| suspects = Chianti and Korn | |||
| suspects-label = Culprits | |||
| description = | |||
}} | |||
Chianti and Korn, being disrupted by the message, end up missing their shots. Rum then questions Chianti what kind of store was robbed, she answer: A firearm robbery store. | |||
Seeing Chianti and Korn's location, Rumi begins shooting at them with a vengeful smile, hitting Chianti in the shoulder. | |||
==== | {{InfoBox Crime | ||
| crime = Shootout | |||
| image = EP1164-1167 Case10.jpg | |||
| location = Unknown building | |||
| victim = Chianti | |||
| age = Unknown | |||
| cause-death = Gunshot wound to the left shoulder | |||
| cause-death-label = Injury | |||
| suspects = Rumi Wakasa | |||
| suspects-label = Culprit | |||
| description = | |||
}} | |||
'''Rumi Wakasa''' is the culprit of the robbery at the nearby firearm store for a weapon to fight back those who are attempting to kill her. She purposely broke Kobayashi's parachute so she could suggest using her own parachute. The purpose was that when Kobayashi and others are out, Korn and Chianti, the snipers would then see Kobayashi as the target and shoot her, which will reveal the place where they are standing so she can shoot them with the gun stolen from the firearm store. | |||
==== Aftermath==== | The two snipers manage to hide from the range of Rumi's scope and Chianti erases the blood she shed. The snipers then retreat from the mission. Rum regrets the failure, and wants to use APTX-4869 to turn back the clock to when his right eye still could see properly. Rumi then has flashbacks of Kohji Haneda's sacrifice. | ||
Conan tells Akai about the recent situation, and confirms with him that Rumi is the missing bodyguard of Amanda Hughes. Akai then tells Conan about his father, Tsutomu Akai, who went missing after he was asked to investigate about Kohji Haneda’s death.</spoiler> | |||
==== Aftermath==== | |||
Conan tells Akai about the recent situation, and confirms with him that Rumi is the missing bodyguard of Amanda Hughes. Akai then tells Conan about his father, Tsutomu Akai, who went missing after he was asked to investigate about Kohji Haneda’s death. Conan warns him about the person with the eye of a snake. </spoiler> | |||
== Story Summary == | |||
<spoiler> | |||
=== Important Events === | |||
* Conan went to the Nishitopia building to cheer Shiratori as an excuse to keep Haibara from being in danger due to Wakasa Rumi. | |||
* Kuroda happened to participate in this tournament as well. | |||
* A murder happened and Conan solved the case with the help of Kuroda and Agasa. | |||
* Kuroda asks Agasa, the teachers, and the children to have a private talk with Conan for a moment. The talk reveals that he was in the Juke Hotel when Amanda and Haneda were killed. | |||
* Rumi Wakasa is revealed to be the missing bodyguard of Amanda Hughes. | |||
* Rum went to the Juke Hotel trying to take Rachel as an ally, but failed. He killed Amanda and Haneda in the process, and also tried to killed Kuroda, who was taking Rachel to the local police, but failed as well. | |||
* Conan and Kuroda deduced Amanda’s final word is to watch out for someone with the eye of a snake, and concluded that Rumi Wakasa was Rachel Asaka. | |||
* Rumi, having felt the imminent danger, robbed a gun shop nearby and used Kobayashi as bait so that she could find the location of the snipers trying to take her down. | |||
* Conan called Shuichi Akai and informed him of the events. Shuichi told him why he joined FBI. | |||
</spoiler> | |||
== Manga to anime changes == | == Manga to anime changes == | ||
{{main|List of differences between the manga and anime}} | {{main|List of differences between the manga and anime}} | ||
* A number of minor dialogues are cut from the anime. For example, the lines when Amanda asks Rum to speak Japanese so that they can talk without putting on airs in front of his subordinate, and some of Kohji's angry lines when Rum asked him about Asaka whereabouts. | |||
* Yoko Okino's TV appearance is not adapted. | * Yoko Okino's TV appearance is not adapted. | ||
== Trivia == | == Trivia == | ||
* The episodes was released as a movie in South Korea on September 19, 2025. | |||
* The anime use a monochrome filter for the whole flashback, with some color scheme to represent the point of view. Rum's POV is red, Rumi's POV is green, and Kuroda's POV is blue. | |||
:* Weirdly, Rumi and Kuroda's color are swapped compared to the color scheme used in [[Opening 59]]. | |||
* The suspects' names are related to '''chess pieces'''<ref>http://mysteriouscolors.blog.fc2.com/blog-entry-231.html</ref>: | * The suspects' names are related to '''chess pieces'''<ref>http://mysteriouscolors.blog.fc2.com/blog-entry-231.html</ref>: | ||
** Kurumi Shiroi (城井 来海) comes from {{nihongo|"rook"|ルーク|rūku}}/{{nihongo|"tower"|城|shiro}} ; | ** Kurumi Shiroi (城井 来海) comes from {{nihongo|"rook"|ルーク|rūku}}/{{nihongo|"tower"|城|shiro}} ; | ||
| Line 344: | Line 432: | ||
* Juke Hotel is modeled after the [[wikipedia:Wyndham New Yorker Hotel|New Yorker Hotel]] and the [[wikipedia:Waldorf Astoria|Waldorf Astoria]] in downtown Manhattan. | * Juke Hotel is modeled after the [[wikipedia:Wyndham New Yorker Hotel|New Yorker Hotel]] and the [[wikipedia:Waldorf Astoria|Waldorf Astoria]] in downtown Manhattan. | ||
* The chess opening played is the [[wikipedia:Queen's Gambit Accepted|Queen's Gambit Accepted]]. | * The chess opening played is the [[wikipedia:Queen's Gambit Accepted|Queen's Gambit Accepted]]. | ||
* Amanda Hughes wears her watch with the clock facing the inner side of the wrist, which was commonly done by older people and women, as watches were easy to break and keeping them inside would reduce friction with hard surfaces<ref>https://smithandbradley.com/blogs/blog/why-do-military-personnel-wear-watches-upside-down</ref> | * Amanda Hughes wears her watch with the clock facing the inner side of the wrist, which was commonly done by older people and women, as watches were easy to break and keeping them inside would reduce friction with hard surfaces.<ref>https://smithandbradley.com/blogs/blog/why-do-military-personnel-wear-watches-upside-down</ref> This was notably shown in [[Metropolitan Police Detective Love Story 4|files 328-330]]. | ||
* Kuroda's car is a white Ford Taurus 4th Generation. | * Kuroda's car is a white Ford Taurus 4th Generation. | ||
* The car tailing Kuroda is a BMW 3 Series (E46). | * The car tailing Kuroda is a BMW 3 Series (E46). | ||
| Line 369: | Line 457: | ||
== In other languages == | == In other languages == | ||
{{BeginTable EpLang}} | {{BeginTable EpLang}} | ||
{{EpLangItem|flag=Arabic|Arabic|ذكريات قبل سبع عشرة سنة الحصان الملطّخ بالدماء|Memories of Seventeen Years Ago<br>(The Bloody Knight/ )}} | {{EpLangItem|flag=Arabic|Arabic|ذكريات قبل سبع عشرة سنة (الحصان الملطّخ بالدماء / الحارسة / اقتحام النؙزل / مناورة الوزير)|Memories of Seventeen Years Ago<br>(The Bloody Knight / The Guard / The Raid on the Inn / The Queen's Maneuver)}} | ||
{{EpLangItem|flag=France|French (Subbed)|Révélations 17 (dix-sept) ans plus tard<br>(Le Cavalier maculé de sang/ Le Démon clairvoyant / Le Fou à la vision lointaine)|Revelations 17 Years Later<br>(The Bloodstained Knight/ The Clairvoyant Devil / The Bishop with the Long-Ranged Vision)}} | {{EpLangItem|flag=France|French (Subbed)|Révélations 17 (dix-sept) ans plus tard<br>(Le Cavalier maculé de sang/ Le Démon clairvoyant / Le Fou à la vision lointaine / Le Gambit de la dame)|Revelations 17 Years Later<br>(The Bloodstained Knight/ The Clairvoyant Devil / The Bishop with the Long-Ranged Vision / The Queen's Gambit)}} | ||
{{EpLangItem|flag=Thailand|Thai||}} | {{EpLangItem|flag=South Korea|Korean|17년 전의 진상|The Truth of 17 Years Ago}} | ||
{{EpLangItem|flag=Thailand|Thai|ความจริงเมื่อ 17 ปีก่อน<br>หมากไนท์อาบเลือด / ปีศาจแห่งดวงตาอันรู้แจ้ง / คาคุเกียวผู้มองการไกล / ควีนส์ แกมบิท |The Truth From 17 Years Ago<br>The Knight Piece Soaked in Blood / The Perceptive of The Devil Eyes / Kakugyo Who Planned Ahead / Queen's Gambit}} | |||
{{EndTable}} | {{EndTable}} | ||
| Line 393: | Line 482: | ||
[[Category:Animation directed by Kenichi Otomo]] | [[Category:Animation directed by Kenichi Otomo]] | ||
[[Category:Animation directed by Nobuyuki Iwai]] | [[Category:Animation directed by Nobuyuki Iwai]] | ||
[[Category:Animation directed by Keiko Sasaki]] | |||
[[de:Episode 1164]] | [[de:Episode 1164]] | ||
[[zh:TV1164]] | [[zh:TV1164]] | ||
Latest revision as of 11:15, 6 June 2026
| ‹ The Counting Song Heard in the Dark | List of Episodes | Genta's Casebook of the Eel › |
| Episode 1164-1167 (Int. Episode 1222-1225) | |
|
| |
| Title: | The 17-Year-Old Truth 1164 The Bloody Knight 1165 The Perceptive Devil 1166 The Far-Sighted Bishop 1167 The Queen's Gambit |
|---|---|
| Japanese title: | (Jūnana-nen Mae no Shinsō) 1164 血染めの 1165 達眼の悪魔 (Tatsugan no Akuma ) 1166 遠見の角行 (Tōmi no Kakugyō ) 1167 |
| Original airdate: | June 7, 2025 (The Bloody Knight) June 14, 2025 (The Perceptive Devil) June 21, 2025 (The Far-Sighted Bishop) June 28, 2025 (The Queen's Gambit) |
| Broadcast rating: | 5.4% (The Bloody Knight) 6.2% (The Perceptive Devil) 4.8% (The Far-Sighted Bishop) 5.2% (The Queen's Gambit) |
| Manga case: | #318 #319 |
| Season: | 30 |
| Manga source: | Volume 104 - F1~7 (1103 · 1104 · 1105 · 1106 · 1107 · 1108 · 1109) |
| Cast: | Conan Edogawa Ran Mouri Kogoro Mouri Ai Haibara Mitsuhiko Tsuburaya Ayumi Yoshida Genta Kojima Sumiko Kobayashi Rumi Wakasa Ninzaburo Shiratori Hyoue Kuroda Kanenori Wakita Juzo Megure Rum Hiroshi Agasa Chianti Korn Shuichi Akai Amanda Hughes Rachel Asaka Kohji Haneda Tsutomu Akai Mary Sera Shukichi Haneda Subaru Okiya Kamen Yaiba |
| Case solved by: | Conan Edogawa (x2) |
| Next Conan's Hint: | Crossword puzzles (The Bloody Knight) Glasses case (The Perceptive Devil) Knight (The Far-Sighted Bishop) Umbrella (The Queen's Gambit) |
| Director: | Yasuichiro Yamamoto Nobuharu Kamanaka |
| Organizer: | Nobuharu Kamanaka |
| Storyboard: | Nobuharu Kamanaka |
| Episode director: | 1164: Masahiro Takada 1165: Ayumi Iemura 1166: Nobuharu Kamanaka 1167: Minoru Tozawa |
| Animation director: | 1164: Akio Kawamura 1165: Mariko Imamura Yui Ushinohama Miho Tanaka Mina Otaka FALCO Suzuki 1166: Asuka Tsubuki Kenichi Otomo Nobuyuki Iwai 1167: Keiko Sasaki |
| Character design: | Masatomo Sudo Kyoko Yoshimi and Chie Saito (sub-character) Hiroshi Ogawa (design works) |
| Production cooperation: | 1164: BIG BANG |
| Opening song: | But No Love |
| Closing song: | Fun! Fun! Fun! |

The 17-Year-Old Truth (
Characters introduced


Cast


Case 1: Chess Tournament Murder
Situation
The Bloody Knight
On a rainy day, Kogoro decides to reward himself with sushi from Iroha Sushi after gaining lots of money from the investigation. While Ran goes out for some tea leaves, Wakita wonders where Conan could be. Kogoro reveals that he will be cheering for Shiratori, who is going to compete in a chess tournament at Nishitopia building, with Haibara, the Detective Boys, Kobayashi, and Rumi.
At that building, after Kobayashi gives Shiratori a knight keychain as the lucky charm, the kids begin discussing what piece is the strongest. And once again, Haibara gets teased as her knowledge is just outstanding compared to those of her age, Conan then has to explain that Agasa was the reason why Haibara knows so much about chess and other knowledge. Later, the group meets up with other tournament participants, including Kurumi Shiroi, Kinji Ogarawa, Naoto Kishitami and Kunikazu Kisaki, with each of them having their own chess piece as a lucky charm. Ogawara mentions that a chess player named Ryoichiro Saso used Amazing Grace as his phone tune, only to be betrayed by the tune itself.
In the tournament, Shiratori faces Kuroda but suddenly someone’s phone rings, causing Shiratori to be distracted and he is then declared lost. However, when the two meet up with Kobayashi’s group, Shiratori loses his lucky charm somewhere, so he has to go back to the tournament to find it. Kuroda then greets Kobayashi and Rumi, he also mentions that he had met Rumi somewhere, even before the event of the burning tent murder case, in which she denies.
Shiroi, Ogawara and Kunikazu are walking to the waiting room when they hear a strange sound, which would remind them of the ringtone played in the match. Later, Ogawara’s glass suddenly breaks when he is going to have his drink, which makes him scream in fear. Apparently, an arrow has flown through his glass and hit his bag at an almost perfect angle. Conan and Kuroda then try to find the culprit’s trace following the open door, and when they pass by a “cleaning up” sign that looks different than those they have just seen earlier in the restroom, Conan opens a restroom and sees Kishitani’s corpse with several arrows in his body. There are also some items near the scene:
- A crossbow that could have been used to perform the murder.
- A magazine that could leave some clue, because of its weird blood stain.
- A knight keychain that Conan confirms belongs to Shiratori.

Kuroda informs Shiratori about the murder scene and that Shiratori is also a suspect. Shiratori agrees with this while trying to provide an alibi, as:
- He was in one of the restrooms to just find the missing lucky charm, but he did not see any cleaning up sign.
- He was in the stairs near that restroom area to find the charm, as he might have dropped it there when he was making a call to his butler to inform him about the result. In addition, he did not see anyone walking by when making the call.
The police arrive and Megure begins listening to their report about the incident, he then deduces that the culprit must have escaped. Conan denies this and thinks that there are still 4 people in the building that could shoot Kishitani: Shiroi, Ogawara, Kunikazu and Shiratori, as following him and Kuroda, no one got in or out of the building. Megure wonders couldn’t Kishitani have killed himself, to which Kuroda explains why it couldn't be. Kunizaku expresses that something is wrong when the police trust a boy like Conan, Kuroda points out that his jacket seems to have a strange tear. Shiroi mentions that they heard a strange sound after returning from the match, and when they return to the place they heard the sound, an arrow is seen stuck in the wall.
The police ask what the suspects had done after leaving the match:
- Kunikazu was buying drinks in the vending machine after he left the match with the victim when Shiroi and Ogawara showed up. After hearing the strange noise, he just played game until the glass broke
- Kishitani received a message when he was buying drinks like Kunikazu, the message frightened him so he ran away somewhere.
- Shiroi was going along with Ogawara until she went to the bathroom to see the match again with earphones, so she didn’t notice much noise outside.
- Ogawara says that he also used the restroom when he separated from Shiroi. He noticed one of the toilets but didn’t know it was Kishitani. After using the restroom, he went to the waiting room with others.
When Megure takes the charm out, Conan can finally see the bloodstained side of it, this reminds both Wakasa and Kuroda of something long ago while Conan is deducing. Megure also states that there is a bloodstained crossword page, indicating that the victim may have left his last word there. The Detective Boys and Haibara mention that there were 2 glass boxes in the trash bin, one with nothing, one with shattered glasses. Conan then smiles, indicating that he knows the truth behind.
Outside the building, Rum is seen smiling in his car with his cigarette.
The Perceptive Devil
Conan calls Agasa to ask how long it takes for him to bring the item, he answers that he has completed the requested item and it’ll need 10 minutes to get there as well. While at the building, Ogawara asks if the three of them are out of the suspicious range, with Kisaki and Shiroi thinking that the culprit must be Shiratori. The Detective Boys and Haibara justify that he can’t be that kind of person, even though he has curly hair, which makes Shiratori speechless. Conan begins his deduction.
People


Resolution

Case 2: The Case 17 Years Ago
Situation
The Perceptive Devil
After the case is over, it is revealed that Kuroda was the one to let Agasa in, as he entrusted Conan to have Agasa in after hearing Conan say that he and Agasa would demonstrate an experiment that would help solve the case. Ayumi suggests that she, other friends, the teachers, and Agasa go to a family restaurant, Kobayashi agrees as the tournament is now cancelled. Kuroda asks the group if he could borrow Conan to have him questioned for a while. Everyone else then decides to go for the second floor for the capsule toy machines, but no one, except Rumi, knows that the security camera has been hacked and controlled to aim at Rumi by Rum and his subordinate, who then send the image of the target to Korn and Chianti.
In a room where Conan and Kuroda can talk privately, Kuroda gives the boy the picture showing the dying message left by an American VIP who was assassinated 17 years ago, which means that the case Kuroda is going to ask Conan coincides with one he has been following with Subaru Okiya. Kuroda begins telling him in detail what happened and why he was there…
Seventeen years ago, Kuroda was having drinks with a friend of his that was living in the U.S and they were discussing the upcoming chess tournament that Kuroda invited the friend to. During the drinking, they happened to see Haneda Kohji, and after the drinking, they saw Amanda Hughes with her bodyguard walk pass by. Amanda then was seen having a friendly chess match with Haneda while the bodyguard, revealed to be Rachel Asaka, was staring at Haneda when he revealed that she is a type of the woman he loves. He also revealed the temporary condition she has based on just her action.
The scene changes just as Rumi is having the same condition Rachel was having, which makes the kids worry about her wellbeing, she reassures that probably she should have rest, and proceeds to go home. But she accidentally breaks Kobayashi’s parachute, which would force her to suggest to Kobayashi to use Rumi’s one while she has to go home via a taxi. Meanwhile, Korn and Chianti are in another building to ambush the target Rum ordered them to, though the condition to perform the sniping sucks.
The Far-Sighted Bishop
Continuing the story 17 years ago…
Possessing excellent memory, Rum accurately identifies all bodyguards seen with Amanda and orders his people to capture and incapacitate them.

Rum also notes that a Japanese man he saw is also a person of interest and orders his agents to also take care of him. However, when attacked, Kuroda is able to take them both down.

Kuroda begins worrying about Amanda's well-being, so he tries to have her room's number via a receptionist, but fails.
Meanwhile, having noticed that Rum and his agents are outside the door, Amanda sends Rachel to Haneda's room to retrieve a knight from her chess set to keep her away from the encounter. When Rum comes into the room, he explains that now that they know Rachel is like a daughter to Amanda, the organisation can use that information and now recruit and force her to help them. Rum presents the APTX 4869 pill to Amanda, showing the alternative, but in an unexpected moment, Amanda voluntarily jumps forward and ingests the pill.

After Rachel reaches Haneda's room, Haneda reveals that Amanda likely sent her away on a wild goose chase on purpose, as there is no way that someone would miss the fact that a knight was missing from the chess case because of the specially designed crevices for each piece. Haneda tells Rachel to hide when Rum and his agents knock on Haneda's door, asking if they have seen a Japanese woman. Haneda says no and swiftly shuts the door. He then goes on to taser Rachel and hide her in the bookcase in his room. Rum then comes back again and notices that the order of the books has slightly changed from before and, knowing that Rachel is hidden in there, reaches out to remove the books.
At the same time, when Kuroda accidentally knows the room Amanda is staying following a bellhop, Amanda's body is discovered. Kuroda orders the bellhop to call the police while Kuroda examines the scene. He realises that the special guest Haneda said he was going to play chess with was in fact Amanda, so, sensing something is off, he requests the bellhop for the room of Haneda, but will it be in time?
Before Rum gets the chance to remove the books, Haneda drops his act and tells Rum he remembers seeing him in the news. Haneda is then repeatedly beaten and eventually fed the APTX 4869 pill as the police are arriving due to. Before he dies, he leaves a final message by cutting up a mirror with the text "Put on mascara".

Kuroda again arrives not in time, as Haneda is also dead in a really messy scene. At this time, Rachel wakes up and, under the assumption Kuroda killed Haneda, begins attacking him. Having no choice after she breaks some of his ribs, he takes Rachel down In a moment of shock when she sees a photo of Amanda's corpse on a phone.
The Queen's Gambit
Rum and his agents outside the hotel see chess notes flying out of the hotel, and Rum deduces that Rachel will be snuck out of the hotel using the bookcase again. However, as they reach Haneda's floor, Kuroda, wheeling a suitcase with Rachel in it, manages to sneak by. After Rum realises that Rachel was in the suitcase, he and his agents get in his car and begin chasing Kuroda's vehicle. However, Kuroda's car ends up being ran into by a truck and his car catches on fire. Seeing the commotion, Rum decides to step away.

In his last moments of consciousness, Kuroda asks an EMT about how the female in his car was, and the EMT says that only he was found, suggesting Rachel escaped before the ambulance got there.
Back in the modern day, Conan is ready to tell his deciphering process about Amanda’s final word; while Agasa, Kobayashi, and the children are impatient that 40 minutes have passed and Conan hasn’t returned, with Kobayashi hoping that Rumi does not soak herself wet. It is partially true as she is standing on the rooftop of another building other than one of the kids and the snipers for something. Rum is regretting not killing them earlier and has to wait til now when Chianti suddenly laughs as some assumed idiot tried to commit a robbery with just a knife.
People (flashback to 17 years ago)


Resolution


Story Summary
Manga to anime changes
- A number of minor dialogues are cut from the anime. For example, the lines when Amanda asks Rum to speak Japanese so that they can talk without putting on airs in front of his subordinate, and some of Kohji's angry lines when Rum asked him about Asaka whereabouts.
- Yoko Okino's TV appearance is not adapted.
Trivia
- The episodes was released as a movie in South Korea on September 19, 2025.
- The anime use a monochrome filter for the whole flashback, with some color scheme to represent the point of view. Rum's POV is red, Rumi's POV is green, and Kuroda's POV is blue.
- Weirdly, Rumi and Kuroda's color are swapped compared to the color scheme used in Opening 59.
- The suspects' names are related to chess pieces[1]:
- Kurumi Shiroi (城井 来海) comes from "rook" (ルーク rūku)/"tower" (城 shiro) ;
- Kinji Ogawara (大河原 欽治) comes from "king" (王 / キング ō / kingu) ;
- Naoto Kishitani (岸谷 直人) comes from "knight" (騎士 / ナイト kishi / naito) ;
- Kunikazu Kisaki (木崎 邦和) comes from "queen" (妃 / クイーン kisaki / kuīn) ;
- Ryoichiro Saso (佐宗 涼一郎) comes from "bishop" (僧侶 sōryo).
- On the floor near Kishitani's body is a copy of the Shonen Sunday magazine. It is titled Shonen Yonday (ヨンデー, Yondē) instead of Sunday (サンデー, Sandē).
- The chess tournament takes place at West Topia (西トピア Nishi Topia), based on the real Hokutopia (北とぴあ, the "Hoku" means north and "Nishi" means west) building in the Kita Ward of Tokyo. The National Chess Tournaments take place each year at Hokutopia[2].
- Rum wears a cowhide dress shirt.
- Juke Hotel is modeled after the New Yorker Hotel and the Waldorf Astoria in downtown Manhattan.
- The chess opening played is the Queen's Gambit Accepted.
- Amanda Hughes wears her watch with the clock facing the inner side of the wrist, which was commonly done by older people and women, as watches were easy to break and keeping them inside would reduce friction with hard surfaces.[3] This was notably shown in files 328-330.
- Kuroda's car is a white Ford Taurus 4th Generation.
- The car tailing Kuroda is a BMW 3 Series (E46).
- Rum's car is a Rolls-Royce Phantom V.
- The police car is a Ford Crown Victoria 2nd Generation.
- The truck that crashed into Kuroda's car is a GMC W-Series.
- The ambulance is a Ford E-250.
- The firetruck is a Seagrave Aerialscope.
- On Conan's phone, his contacts are named as such: Ran-neechan[4] (Ran Mouri), Hakase[5] (Hiroshi Agasa), Haibara (Ai Haibara), Mitsuhiko (Mitsuhiko Tsuburaya) and Ayumi (Ayumi Yoshida).
Each Person's "17 Years Ago" videos
In promotion of this case, three original short videos titled “Each Person’s ‘17 Years Ago’”, have been released on the official Detective Conan YouTube channel, each supervised by Gosho Aoyama.[6][7]
Each video features one of the characters—Hyoue Kuroda, Rumi Wakasa, and Kanenori Wakita—reflecting on their memories and thoughts from 17 years ago.
Release Schedule
- June 4 – Hyoue Kuroda edition (Video)
- June 5 – Rumi Wakasa edition (Video)
- June 6 – Kanenori Wakita edition (Video)
Gallery
In other languages
| Language | Title | Translation |
|---|---|---|
| ذكريات قبل سبع عشرة سنة (الحصان الملطّخ بالدماء / الحارسة / اقتحام النؙزل / مناورة الوزير) | Memories of Seventeen Years Ago (The Bloody Knight / The Guard / The Raid on the Inn / The Queen's Maneuver) | |
| Révélations 17 (dix-sept) ans plus tard (Le Cavalier maculé de sang/ Le Démon clairvoyant / Le Fou à la vision lointaine / Le Gambit de la dame) |
Revelations 17 Years Later (The Bloodstained Knight/ The Clairvoyant Devil / The Bishop with the Long-Ranged Vision / The Queen's Gambit) | |
| 17년 전의 진상 | The Truth of 17 Years Ago | |
| ความจริงเมื่อ 17 ปีก่อน หมากไนท์อาบเลือด / ปีศาจแห่งดวงตาอันรู้แจ้ง / คาคุเกียวผู้มองการไกล / ควีนส์ แกมบิท |
The Truth From 17 Years Ago The Knight Piece Soaked in Blood / The Perceptive of The Devil Eyes / Kakugyo Who Planned Ahead / Queen's Gambit |
References
See also
| Episodes of Season 30 | ||
|---|---|---|
| Episode 1148 • 1149 • 1150 • 1151 • 1152 • 1153 • 1154 • 1155 • 1156 • 1157 • 1158 • 1159 • 1160 • 1161 • 1162 • 1163 • 1164 • 1165 • 1166 • 1167 • 1168 • 1169 • 1170 • 1171 • 1172 • 1173 • 1174 • 1175 • 1176 • 1177 • 1178 • 1179 • 1180 • 1181 • 1182 • 1183 • 1184 • 1185 • 1186 |
- Pages with broken file links
- Episodes
- Animation directed by Akio Kawamura
- Animation directed by Mariko Imamura
- Animation directed by Yui Ushinohama
- Animation directed by Miho Tanaka
- Animation directed by Mina Otaka
- Animation directed by FALCO Suzuki
- Animation directed by Asuka Tsubuki
- Animation directed by Kenichi Otomo
- Animation directed by Nobuyuki Iwai
- Animation directed by Keiko Sasaki