Difference between pages "Search for Maria-chan!" and "Volume 98"
| Line 1: | Line 1: | ||
| − | {{InfoBox | + | {{InfoBox Volume |
| − | | | + | | volume = 98 |
| − | + | | image = Volume 98.jpg | |
| − | | image = | + | | releasedate = April 15, 2020 |
| − | | | + | | chapters = 1037-1047 |
| − | | | + | | isbn = 978-4-09-850059-8 |
| − | | | + | | publisher = [[Shogakukan]] |
| − | | | + | | english-releasedate = April 14, 2026<ref>[https://www.viz.com/manga-books/manga/case-closed-volume-98/product/8787 Viz, December 31, 2025]</ref> |
| − | + | | english-isbn = 978-1-9747-6252-1 | |
| − | + | | english-publisher = [[Viz Media]] | |
| − | | | + | | detective = [[Totono Kuno]] |
| − | + | | keyhole = [[Momiji Ooka]] | |
| − | + | | prev-volume = Volume 97 | |
| − | + | | next-volume = Volume 99 | |
| − | |||
| − | | | ||
| − | |||
| − | | | ||
| − | |||
| − | | | ||
| − | | | ||
| − | |||
| − | |||
| − | |||
| − | |||
| − | |||
| − | |||
| − | | prev- | ||
| − | | next- | ||
| footnotes = | | footnotes = | ||
}} | }} | ||
| − | + | Volume 98 was released on April 15, 2020. | |
== Cast == | == Cast == | ||
{{char Appearances| | {{char Appearances| | ||
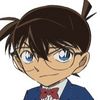
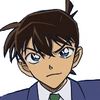
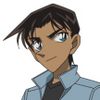
{{char|Conan Edogawa}} | {{char|Conan Edogawa}} | ||
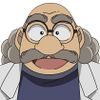
| + | {{char|Hiroshi Agasa}} | ||
{{char|Ai Haibara}} | {{char|Ai Haibara}} | ||
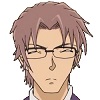
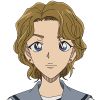
| + | {{char|Subaru Okiya}} | ||
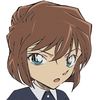
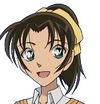
| + | {{char|Masumi Sera}} | ||
| + | {{char|Juzo Megure}} | ||
| + | {{char|Wataru Takagi}} | ||
| + | {{char|Kazunobu Chiba}} | ||
| + | {{char|Mary Sera}} | ||
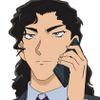
| + | {{char|Shuichi Akai}} | ||
| + | {{char|Shukichi Haneda}} | ||
| + | {{char|Kohji Haneda|display=Kohji Haneda (flashback)}} | ||
| + | {{char|Tsutomu Akai|display=Tsutomu Akai (flashback)}} | ||
| + | {{char|Kurisuke Agasa|display=Kurisuke Agasa (flashback)}} | ||
| + | {{char|Ran Mouri}} | ||
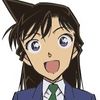
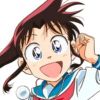
| + | {{char|Momiji Ooka}} | ||
| + | {{char|Muga Iori}} | ||
| + | {{char|Shinichi Kudo|display=Shinichi Kudo (flashback)}} | ||
{{char|Ayumi Yoshida}} | {{char|Ayumi Yoshida}} | ||
| + | {{char|Mitsuhiko Tsuburaya}} | ||
{{char|Genta Kojima}} | {{char|Genta Kojima}} | ||
| − | {{char| | + | {{char|Yaiba Kurogane|display=Yaiba Kurogane<br>(on TV)}} |
| − | {{char| | + | {{char|Sayaka Mine|display=Sayaka Mine<br>(on TV)}} |
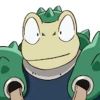
| − | {{char| | + | {{Char|Gerozaemon Geroda|display=Gerozaemon Geroda (on TV)}} |
| − | {{char| | + | {{Char|Namako-Otoko|display=Namako-Otoko (on TV + phone strap)}} |
| − | {{char| | + | {{char|Kogoro Mouri}} |
| − | {{char| | + | {{char|Heiji Hattori}} |
| + | {{char|Kazuha Toyama}} | ||
| + | {{char|Hideo Akagi|display=Hideo Akagi (background)}} | ||
| + | {{char|Ryusuke Higo|display=Ryusuke Higo (background)}} | ||
| + | {{char|Yumi Miyamoto}} | ||
| + | {{char|Chikara Katsumata|display=Chikara Katsumata (background)}} | ||
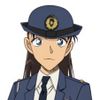
| + | {{char|Miwako Sato}} | ||
| + | {{char|Inspector Yuminaga}} | ||
| + | {{char|Naeko Miike}} | ||
{{char|Yusaku Kudo}} | {{char|Yusaku Kudo}} | ||
{{char|Yukiko Kudo}} | {{char|Yukiko Kudo}} | ||
| − | {{char| | + | {{char|Andre Camel|display=Andre Camel<br>(phone call)}} |
| − | |||
| − | |||
| − | |||
| − | |||
| − | |||
| − | |||
| − | |||
| − | |||
| − | |||
| − | |||
| − | |||
{{char|Gin|display=Gin<br>(background)}} | {{char|Gin|display=Gin<br>(background)}} | ||
{{char|Vodka|display=Vodka<br>(background)}} | {{char|Vodka|display=Vodka<br>(background)}} | ||
| Line 63: | Line 62: | ||
{{char|Chianti|display=Chianti<br>(background)}} | {{char|Chianti|display=Chianti<br>(background)}} | ||
{{char|Korn|display=Korn<br>(background)}} | {{char|Korn|display=Korn<br>(background)}} | ||
| − | {{char| | + | {{char|Sonoko Suzuki}} |
| − | + | }} | |
| − | + | ||
| − | + | == Gadgets == | |
| − | + | {{gadgets Appearances| | |
| − | + | {{gadget|Voice-Changing Bowtie}} | |
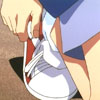
| − | + | {{Gadget|Power-Enhancing Kick Shoes}} | |
| − | + | {{Gadget|Anywhere Ball Dispensing Belt}} | |
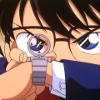
| − | + | {{gadget|Stun-Gun Wristwatch}} | |
| − | |||
| − | {{ | ||
| − | |||
| − | {{ | ||
| − | {{ | ||
| − | {{ | ||
| − | {{ | ||
| − | |||
| − | |||
| − | |||
}} | }} | ||
| − | == Case == | + | == Chapters == |
| − | === | + | === Antique Facet Case === |
| − | + | {{ref anime|1018-1020|The Antique Tray Can't Be Hidden}} | |
| + | ==== File 1037 - The Stream of Time... ==== | ||
| + | Conan suspects that Mary is a member of SIS ("Secret Intelligence Service"). | ||
| − | ==== | + | ==== File 1038 - Show, Don't Hide ==== |
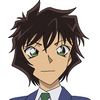
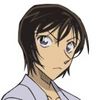
| − | + | <spoiler>The culprit is '''Motoyuki Tojima''' since he is the only one with the crane's beak pointing at 2 o' clock when the bloodstain was at 10 o' clock. The real tray having the bloodstain from the victim's view was pointing at 2 o' clock angle, which when Agasa flipped it horizontally, the crane's beak was at 2 o' clock angle while the bloodstain is at 10 o' clock, which is perpendicular from each other. Conan tells that nor Sakamaki or Chono would have been able to kill the appraiser since swinging the spear for them would have caused the floor to creak and the appraiser to look behind and see the culprit. Tojima says that even it would have made noise, Nishitsu wouldn't have been able to hear anything since the aid wasn't functioning. This last sentence Tojima said proves that he is the culprit since he shouldn't have known that it wasn't functioning at the time unless he was there in the room with Nishitsu which makes Tojima confess that he didn't want to kill him. The motive for killing the appraiser and snatching the real tray was to cover up the cost of his daughter's operation which cost about 5 million yen while he thought his tray was fake and of no value. [[Subaru Okiya]] tells him that in fact, his tray was most probably a prototype made by apprentices and its value should be able to cover up the costs. Tojima bursts into tears as he realizes he had killed the appraiser for nothing. The real tray belongs to Kinji Chouno and he was willing to lend it to Sakamaki for her exhibition at a reasonable price. The proof that it was the real tray was because since Nishitsu was sitting in front of the real tray's box, the blood that would splatter from his head would have likely fallen into the real tray's box just in front of Nishitsu and the only box with blood spots inside is the old man's. | |
| − | {{ | + | After the end of the case, Sera questions Mary about the "50:50" catchprase. Mary replies that it is her catchphrase as well, and it's a line that her [[Tsutomu Akai|husband]] used to say and her son Shuichi inherited from him. Sera informs her mother that getting the drug at the moment is diffucult since Subaru is standing in her way, which surprised Mary. After learning the truth about the "50:50" catchphrase, Sera suspects that Subaru is Akai, but attempts to deny it since she thinks that her brother is supposed to be dead.</spoiler> |
| − | | | + | |
| − | | | + | ==== People ==== |
| − | | | + | {{BeginBox}} |
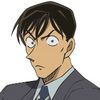
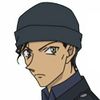
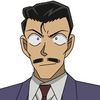
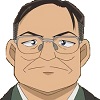
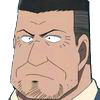
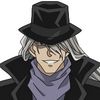
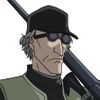
| − | | | + | {{people|Hogen Nishitsu|Hogen Nishitsu manga.jpg| |
| − | + | * Victim (bludgeoned and stabbed) | |
| − | + | * 71 years old | |
| − | | | + | * Antiques dealer |
| − | + | * Agasa's aquaintance}} | |
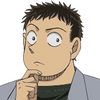
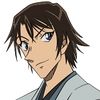
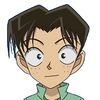
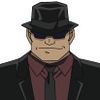
| − | + | {{People|Motoyuki Tojima|Motoyuki Tojima manga.jpg| | |
| − | + | * 41 years old | |
| − | }} | + | * Securities company employee |
| + | * Appraisal client}} | ||
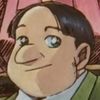
| + | {{People|Kinji Chono|Kinji Chono manga.jpg| | ||
| + | * 74 years old | ||
| + | * Former real estate company CEO | ||
| + | * Appraisal client}} | ||
| + | {{people|Suzue Sakamaki|Suzue Sakamaki manga.jpg| | ||
| + | * 46 years old | ||
| + | * Art museum director | ||
| + | * Appraisal client}} | ||
| + | {{EndBox}} | ||
| + | |||
| + | ==== ''Major events'' ==== | ||
| + | * Shuichi appears as Subaru to keep an eye on Sera. | ||
| + | * Shuichi's flashback seventeen years ago. | ||
| + | * Conan suspect Mary is a member of member of the British Secret Intelligence Service, known as MI6. Sera suspect Subaru could be her older brother Shuichi. | ||
| + | |||
| + | === Lover Code Case === | ||
| + | {{ref anime|1024-1025|Momiji Ooka's Challenge}} | ||
| + | ==== File 1039 - Momiji's Challenge ==== | ||
| + | |||
| + | ==== File 1040 - From Your Footbowl Loving Mother ==== | ||
| + | |||
| + | ==== File 1041 - Brothers Reuniting After Thirty Years ==== | ||
| + | |||
| + | ==== File 1042 - The Jingisukan of Memories ==== | ||
| + | <spoiler>Realizing Ran wants Shinichi to let Heiji win for the sake of their relation, Conan lets Heiji solve the case. He reveals that the culprit is '''Saisuke Jinya''', or rather the person who is '''impersonating Saisuke Jinya''' who reveals that he passed away a few days ago due to an illness. The fake Jinya actually was friends with the real Jinya and had that burn mark since he had put citrus juice on his hand and got a sunburn. Conan, to prove it, drops lemon juice on the fake Jinya's arm which triggers him. It is also proven he is not the real brother since he didn't know that the four children got a burn after putting their hands on the pot to lift their mother's head who fell on it. Other evidences are that the fake Jinya's ears didn't match the ears of the other brothers as ears type are transmitted through DNA. The glasses the fake Jinya is wearing are in fact the ones from Hamana because Hamana had developped metal allergy (prooved by the fact he refused canned goods, chocolate and leather which all contained metal) and wouldn't be able to wear those metal-framed glasses he had on his body. Jinya put them on him because his glasses fell on the ground and smashed so he had to exchange them with Hamana's but couldn't see well evidenced by the fact that the scratch marks on the glasses Hamana is wearing don't match the impact of his fall. The only one with glasses is then Jinya who reveals that he killed Hamana by accident because he pushed him of the ledge while they were fighting for the mother's treasure which Jinya was longing for. After Jinya got arrested, Heiji tells the two other brothers that the treasure is in fact the Jingisukan wok that was in Hamana's bag because the mother wanted the kids to all have Jingisukan after her death to remember her. After this case is closed, Conan asks Heiji which family did that housekeeper work on. Heiji replies that she works for Haneda's family, [[Shukichi Haneda]] old house. Conan thinks that since Shukichi Haneda is the middle brother sibling of Shuichi Akai and Masumi Sera, and also non-blood-related brother of Kohji Haneda, suspect that Kohji Haneda could be the son of a rich and noble family.<br>{{people|Saisuke Jinya|Real Saisuke Jinya manga.jpg| | ||
| + | * Deceased (illness) | ||
| + | * 36 years old | ||
| + | * Housekeeper's real fourth son}} | ||
| + | </spoiler> | ||
| − | + | ==== People ==== | |
| + | {{BeginBox}} | ||
| + | {{people|Benzo Hamana|Benzo Hamana manga.jpg| | ||
| + | * Victim (fell) | ||
| + | * 42 years old | ||
| + | * Department store buyer | ||
| + | * Housekeeper's eldest son}} | ||
| + | {{People|Suguru Kashiwagi|Suguru Kashiwagi manga.jpg| | ||
| + | * 39 years old | ||
| + | * Bank employee | ||
| + | * Housekeeper's second son}} | ||
| + | {{People|Katsunobu Kanda|Katsunobu Kanda manga.jpg| | ||
| + | * 38 years old | ||
| + | * Bike store employee | ||
| + | * Housekeeper's third son}} | ||
| + | {{people|Saisuke Jinya|Saisuke Jinya manga.jpg| | ||
| + | * 36 years old | ||
| + | * Unemployed | ||
| + | * Housekeeper's fourth son}} | ||
| + | {{people|Old man|V98 old man.jpg| | ||
| + | * Haido port worker}} | ||
| + | {{EndBox}} | ||
| − | ==== | + | ==== ''Major events'' ==== |
| − | + | * Conan deduces that Kohji Haneda is the son of a wealthy family. | |
| + | * Heiji tries confessing to Kazuha at the Haido Harbor but fails again, as Momiji and Iori ask her to take a photo and she runs off. | ||
| − | + | === Shogi Player Serial Murder Case === | |
| + | {{ref anime|1033-1035|Taiko Meijin's Shogi Board}}The Birthday Party of Divine Punishment | ||
| + | ==== File 1043 - The Meijin's Beard ==== | ||
| − | + | ==== File 1044 - The Meijin's Eyes ==== | |
| − | + | ==== File 1045 - The Meijin's Hand ==== | |
| − | === People === | + | ==== File 1046 - The Meijin's Winning Hand ==== |
| + | <spoiler>The culprit is '''Kousuke Hishinuma'''. | ||
| + | Shukichi wanted to introduce Yumi to his [[Mary|mother]], but is unable to contact her. After being told he didn't tell their mother that he is still alive, Shuichi reassures his brother that he will meet her eventually, once the mist that covers the [[Black Organization]] has been cleared up. | ||
| + | </spoiler> | ||
| + | ==== People ==== | ||
{{BeginBox}} | {{BeginBox}} | ||
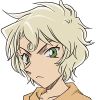
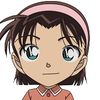
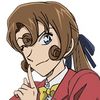
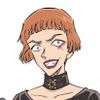
| − | {{People| | + | {{people|[[Mina Katsumata]]|Mina Katsumata manga.jpg| |
| − | * Deceased ( | + | * 23 years old |
| − | * | + | * [[Chikara Katsumata]]'s daughter |
| − | * | + | * Dated Kinji |
| − | {{ | + | * Shogi player}} |
| − | * | + | {{People|Shouko Uryu|Shouko Uriyu manga.jpg| |
| − | * | + | * 23 years old |
| − | {{ | + | * Shogi player}} |
| − | * | + | {{People|Kousuke Hishinuma|Kousuke Hishinuma manga.jpg| |
| − | * | + | * 24 years old |
| + | * Shogi player}} | ||
| + | {{people|Yasukiyo Genda|Yasukiyo Genda manga.jpg| | ||
| + | * Victim (strangled) | ||
| + | * Shogi player}} | ||
| + | {{people|Kimiharu Nishikido|Nishikido manga.jpg| | ||
| + | * Deceased (beaten) | ||
| + | * Shogi player | ||
| + | * Suspected of match-fixing}} | ||
| + | {{people|Yuuhei Kishimoto|Yuuhei Kishimoto manga.jpg| | ||
| + | * Victim (murdered) | ||
| + | * Shogi player | ||
| + | * Developped depression due to Kinji's death}} | ||
| + | {{people|Kinji Uryu|Kinji Uryu manga.jpg| | ||
| + | * Deceased (hanged) | ||
| + | * Shoko's brother | ||
| + | * Dated Mina | ||
| + | * Shogi player}} | ||
{{EndBox}} | {{EndBox}} | ||
| − | === | + | ==== ''Major events'' ==== |
| − | + | * Yumi tails Shukichi of suspecting having an affair. However, it is revealed that Shukichi is holding a Shogi practice session with younger Shogi players. | |
| − | + | * Shukichi was adopted by Haneda's family to fullfill Kohji Haneda's dream. | |
| − | + | * Shukichi is unable to contact his mother Mary. | |
| + | * Shukichi wants to introduce Yumi to his mother. | ||
| + | * Shuichi appears without his disguise to save Shukichi. | ||
| − | + | === Sisters' Birthday Party Murder Case === | |
| + | {{ref anime|1045-1046|The Birthday Party of Divine Punishment}} | ||
| + | ==== File 1047 - He Has It With Him ==== | ||
| − | [[ | + | ==== People ==== |
| + | {{BeginBox}} | ||
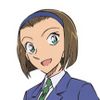
| + | {{people|[[Yumi Sekizawa]]|Yumi Sekizawa manga.jpg| | ||
| + | * 17 years old | ||
| + | * Teitan High School-Second year student | ||
| + | * Ran, Sonoko and Masumi's classmate}} | ||
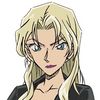
| + | {{People|Remi Sekizawa|Remi Sekizawa manga.jpg| | ||
| + | * 21 years old | ||
| + | * Model | ||
| + | * Yumi's sister}} | ||
| + | {{People|Mitomu Kushiyama| Mitomu Kushiyama manga.jpg| | ||
| + | * 28 years old | ||
| + | * Remi's manager}} | ||
| + | {{people|Tsuguo Hatsune|Tsuguo Hatsune manga.jpg| | ||
| + | * 21 years old | ||
| + | * Pastry chef}} | ||
| + | {{people|Mizutoshi Hanasaki|Mizutoshi Hanasaki manga.jpg| | ||
| + | * Victim (poison) | ||
| + | * 32 years old | ||
| + | * Hair and make-up artist}} | ||
| + | {{EndBox}} | ||
== Trivia == | == Trivia == | ||
| − | * | + | === Locations === |
| − | * [[ | + | {{main|Setting}} |
| − | * | + | Settings featured in this volume: |
| − | * | + | |
| + | ==== [[England]] ==== | ||
| + | * [[London]] (Flashback) | ||
| + | ** [[Wikipedia:London Borough of Lambeth|London Borough of Lambeth]] (Flashback) | ||
| + | *** [[Wikipedia:Vauxhall|Vauxhall]] (Flashback) | ||
| + | **** [[SIS Building]] (Flashback, background) | ||
| + | **** [[Wikipedia:Vauxhall Bridge|Vauxhall Bridge]] (Flashback) | ||
| + | |||
| + | === [[Japan]] === | ||
| + | * [[Osaka]] (Flashback) | ||
| + | ** [[Kaihou High School]] (Flashback) | ||
| + | * [[Tokyo]] | ||
| + | ** [[Beika]] Ward | ||
| + | *** [[Beika#Beika Town|Beika Town]] | ||
| + | **** Apartment building of the Shogi training group (Introduction) | ||
| + | **** [[Hiroshi Agasa's residence]] | ||
| + | **** Jingisukan Beika (Mentioned) | ||
| + | **** [[Kudo residence]] | ||
| + | **** [[Mouri Detective Agency]] | ||
| + | **** [[Ramen Ogura]] | ||
| + | **** Star Donut (Introduction) | ||
| + | **** Yamai Bookstore (Introduction) | ||
| + | *** [[Beika#Haido Town|Haido Town]] | ||
| + | **** [[Haido Central Building]] (Introduction) | ||
| + | **** Haido Pancake Café (Introduction) | ||
| + | **** [[Haido Port]] (Introduction) | ||
| + | ** [[Wikipedia:Chiyoda, Tokyo|Chiyoda Ward]] | ||
| + | *** [[Tokyo Metropolitan Police Department]] | ||
| + | ** Unknown ward | ||
| + | *** Café Zoo-Too (Introduction) | ||
| + | *** [[Hotel Bond-Seven]] (Introduction) | ||
| + | *** Kousuke Hishinuma's apartment (Introduction) | ||
| + | *** Nishitsu Hogen's residence | ||
| + | |||
| + | === Models === | ||
| + | {{main|Setting models}} | ||
| + | |||
| + | ==== Haido Port ==== | ||
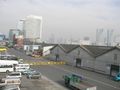
| + | [[Haido Port]] from the second case ("Lover Code") is practically identical to the real life Hinode Pier at the border between [[Wikipedia:Minato, Tokyo|Minato]] (which it belongs to) and [[Wikipedia:Chiyoda, Tokyo|Chiyoda Wards]] in [[Tokyo]], in turn also implying [[Beika#Haido Town|Haido Town]] to be around the border of these wards again. The warehouses on the right (and the one the case happens in) are the Hinode Pier Warehouses (Second block, Kaigan District, Minato Ward), in real life, the ones on the panel/photo are numbered 2-A, 2-B, 2-C and so on, but in this case, they are simply given numbers. Judging by their [[manga]] and real life succession, No. 4 (where the murder happens in) should correlate with warehouse 2-D. | ||
| + | |||
| + | The ship in front of the other one [[Ran Mouri]], [[Kazuha Toyama]], and [[Momiji Ooka]] photograph themselves in front of in the last chapter of the same case is the "[https://www.silversea.com/en/ships/silver-muse.html Silver Muse]" of Silverseas company, which actually passes (or passed, it seemingly moved to Canada afterwards) the Hinode Pier on its route when it arrives in Tokyo after leaving [[Wikipedia: Yokohama|Yokohama]] to the north, just like it passed Haido Port during this case. | ||
| + | |||
| + | <gallery> | ||
| + | File:Haido Port.jpg|thumb|200px|right|Haido Port in the "Lover Code Case"... | ||
| + | File:Hinode Pier.jpg|thumb|200px|right|... and the real Hinode Pier. | ||
| + | </gallery> | ||
| + | |||
| + | === Continuity === | ||
| + | {{main|Continuity}} | ||
| + | |||
| + | ==== In "Sisters' Birthday Party Murder Case" ==== | ||
| + | * To '''Crimson School Trip Case (Manga: [[Volume 94#Crimson School Trip Case|1000]]-[[Volume 95#Crimson School Trip Case|1005]])''': [[Conan Edogawa]] remembers about how [[Ai Haibara]] gave him the antidotes for the school trip, referring to the one to [[Kyoto]] from that case. | ||
| − | == | + | === Crossover === |
| − | {{main| | + | {{main|Crossover}} |
| − | |||
| − | == | + | ==== ''Yaiba'' ==== |
| − | {{main | + | [[File:File 1039 Detective Boys Yaiba Sayaka Game.jpg|thumb|right|200px|Yaiba and Sayaka as game characters.]]{{main|Yaiba}} |
| + | * The [[Detective Boys]] play a platformer videogame featuring [[Yaiba Kurogane]] and [[Sayaka Mine]] while they are at Professor [[Hiroshi Agasa]]'s [[Hiroshi Agasa's residence|house]]. Their running pose also is a little bit reminiscent of the walking pose they have on the cover of [[Yaiba Volume 1]]. If you look very closely at the second panel the game can be seen in, you can spot two character portraits on the right side of the monitor, seemingly depicting the faces of [[Gerozaemon Geroda]] and [[Namako-Otoko]], right above [[Genta Kojima]]'s head. Namako also appears as [[Ran Mouri]]'s mobile phone strap again. | ||
| + | {{clear}} | ||
| − | == | + | == Covers in other countries == |
| − | + | <div><ul> | |
| − | + | <li style="display: inline-block;">[[File:Volume98cc.jpg|150px|thumb|left|China]]</li> | |
| − | + | <li style="display: inline-block;">[[File:Volume98f.jpg|150px|thumb|left|France]]</li> | |
| − | + | <li style="display: inline-block;">[[File:Volume98g.jpg|150px|thumb|left|Germany]]</li> | |
| − | + | <li style="display: inline-block;">[[File:Volume98ce.jpg|150px|thumb|left|Hong Kong (China)]]</li> | |
| − | + | <li style="display: inline-block;">[[File:Volume98bi.jpg|150px|thumb|left|Indonesia]]</li> | |
| + | <li style="display: inline-block;">[[File:Volume98i.jpg|150px|thumb|left|Italy]]</li> | ||
| + | <li style="display: inline-block;">[[File:Volume98k.jpg|150px|thumb|left|Korea]]</li> | ||
| + | <li style="display: inline-block;">[[File:Volume98cw.jpg|150px|thumb|left|Rep. of China (Taiwan)]]</li> | ||
| + | <li style="display: inline-block;">[[File:Volume2 101sp.jpg|150px|thumb|left|Spain (Spanish, Volumen 2)]]</li> | ||
| + | <li style="display: inline-block;">[[File:Volume98th.jpg|150px|thumb|left|Thailand]]</li> | ||
| + | <li style="display: inline-block;">[[File:Volume98e.jpg|150px|thumb|left|United States]]</li> | ||
| + | <li style="display: inline-block;">[[File:Volume98v.jpg|150px|thumb|left|Vietnam]]</li> | ||
| + | </ul></div> | ||
== References == | == References == | ||
| Line 163: | Line 313: | ||
== See also == | == See also == | ||
| − | * [[ | + | * [[Manga]] |
| + | * [[Volume 91-100]] | ||
| + | * [[Detective Conan]] | ||
| − | {{ | + | {{Volumes}} |
| − | |||
| − | [[Category: | + | [[Category:Volumes]] |
| − | |||
| − | |||
| − | [[de: | + | [[de:Band 98]] |
| − | |||
Latest revision as of 07:15, 31 December 2025
| ‹ Volume 97 | List of Chapters • List of Cases | Volume 99 › |
| Volume 98 | |||
|
| |||
| Release date: | April 15, 2020 | ||
|---|---|---|---|
| Chapters: | 1037-1047 | ||
| ISBN: | ISBN 978-4-09-850059-8 | ||
| Publisher: | Shogakukan | ||
| English release date: | April 14, 2026[1] | ||
| English ISBN: | ISBN 978-1-9747-6252-1 | ||
| English Publisher: | Viz Media | ||
| |||
| |||


Volume 98 was released on April 15, 2020.
Contents
Cast


Gadgets
Chapters
Antique Facet Case
File 1037 - The Stream of Time...
Conan suspects that Mary is a member of SIS ("Secret Intelligence Service").
File 1038 - Show, Don't Hide

People


Major events
- Shuichi appears as Subaru to keep an eye on Sera.
- Shuichi's flashback seventeen years ago.
- Conan suspect Mary is a member of member of the British Secret Intelligence Service, known as MI6. Sera suspect Subaru could be her older brother Shuichi.
Lover Code Case
File 1039 - Momiji's Challenge
File 1040 - From Your Footbowl Loving Mother
File 1041 - Brothers Reuniting After Thirty Years
File 1042 - The Jingisukan of Memories

People


Major events
- Conan deduces that Kohji Haneda is the son of a wealthy family.
- Heiji tries confessing to Kazuha at the Haido Harbor but fails again, as Momiji and Iori ask her to take a photo and she runs off.
Shogi Player Serial Murder Case
The Birthday Party of Divine Punishment
File 1043 - The Meijin's Beard
File 1044 - The Meijin's Eyes
File 1045 - The Meijin's Hand
File 1046 - The Meijin's Winning Hand
People


Major events
- Yumi tails Shukichi of suspecting having an affair. However, it is revealed that Shukichi is holding a Shogi practice session with younger Shogi players.
- Shukichi was adopted by Haneda's family to fullfill Kohji Haneda's dream.
- Shukichi is unable to contact his mother Mary.
- Shukichi wants to introduce Yumi to his mother.
- Shuichi appears without his disguise to save Shukichi.
Sisters' Birthday Party Murder Case
File 1047 - He Has It With Him
People


Trivia
Locations
Settings featured in this volume:
England
- London (Flashback)
- London Borough of Lambeth (Flashback)
- Vauxhall (Flashback)
- SIS Building (Flashback, background)
- Vauxhall Bridge (Flashback)
- Vauxhall (Flashback)
- London Borough of Lambeth (Flashback)
Japan
- Osaka (Flashback)
- Kaihou High School (Flashback)
- Tokyo
- Beika Ward
- Beika Town
- Apartment building of the Shogi training group (Introduction)
- Hiroshi Agasa's residence
- Jingisukan Beika (Mentioned)
- Kudo residence
- Mouri Detective Agency
- Ramen Ogura
- Star Donut (Introduction)
- Yamai Bookstore (Introduction)
- Haido Town
- Haido Central Building (Introduction)
- Haido Pancake Café (Introduction)
- Haido Port (Introduction)
- Beika Town
- Chiyoda Ward
- Unknown ward
- Café Zoo-Too (Introduction)
- Hotel Bond-Seven (Introduction)
- Kousuke Hishinuma's apartment (Introduction)
- Nishitsu Hogen's residence
- Beika Ward
Models
Haido Port
Haido Port from the second case ("Lover Code") is practically identical to the real life Hinode Pier at the border between Minato (which it belongs to) and Chiyoda Wards in Tokyo, in turn also implying Haido Town to be around the border of these wards again. The warehouses on the right (and the one the case happens in) are the Hinode Pier Warehouses (Second block, Kaigan District, Minato Ward), in real life, the ones on the panel/photo are numbered 2-A, 2-B, 2-C and so on, but in this case, they are simply given numbers. Judging by their manga and real life succession, No. 4 (where the murder happens in) should correlate with warehouse 2-D.
The ship in front of the other one Ran Mouri, Kazuha Toyama, and Momiji Ooka photograph themselves in front of in the last chapter of the same case is the "Silver Muse" of Silverseas company, which actually passes (or passed, it seemingly moved to Canada afterwards) the Hinode Pier on its route when it arrives in Tokyo after leaving Yokohama to the north, just like it passed Haido Port during this case.
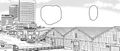
Haido Port in the "Lover Code Case"...
... and the real Hinode Pier.


Continuity
In "Sisters' Birthday Party Murder Case"
- To Crimson School Trip Case (Manga: 1000-1005): Conan Edogawa remembers about how Ai Haibara gave him the antidotes for the school trip, referring to the one to Kyoto from that case.
Crossover
Yaiba

- The Detective Boys play a platformer videogame featuring Yaiba Kurogane and Sayaka Mine while they are at Professor Hiroshi Agasa's house. Their running pose also is a little bit reminiscent of the walking pose they have on the cover of Yaiba Volume 1. If you look very closely at the second panel the game can be seen in, you can spot two character portraits on the right side of the monitor, seemingly depicting the faces of Gerozaemon Geroda and Namako-Otoko, right above Genta Kojima's head. Namako also appears as Ran Mouri's mobile phone strap again.
Covers in other countries


References
See also
| Volumes of the Manga | ||
|---|---|---|
| Volume 1 • 2 • 3 • 4 • 5 • 6 • 7 • 8 • 9 • 10 • 11 • 12 • 13 • 14 • 15 • 16 • 17 • 18 • 19 • 20 • 21 • 22 • 23 • 24 • 25 • 26 • 27 • 28 • 29 • 30 • 31 • 32 • 33 • 34 • 35 • 36 • 37 • 38 • 39 • 40 • 41 • 42 • 43 • 44 • 45 • 46 • 47 • 48 • 49 • 50 • 51 • 52 • 53 • 54 • 55 • 56 • 57 • 58 • 59 • 60 • 61 • 62 • 63 • 64 • 65 • 66 • 67 • 68 • 69 • 70 • 71 • 72 • 73 • 74 • 75 • 76 • 77 • 78 • 79 • 80 • 81 • 82 • 83 • 84 • 85 • 86 • 87 • 88 • 89 • 90 • 91 • 92 • 93 • 94 • 95 • 96 • 97 • 98 • 99 • 100 • 101 • 102 • 103 • 104 • 105 • 106 • 107 • 108 • 109 |