Difference between revisions of "The Interrogation Room 3"
From Detective Conan Wiki
| Line 60: | Line 60: | ||
| description = At first when Nagisa was requested to follow the police, she admitted the crime. But in the interrogation room, she denies it. This raises the suspicion that someone else must have disguised as her and committed the crime. | | description = At first when Nagisa was requested to follow the police, she admitted the crime. But in the interrogation room, she denies it. This raises the suspicion that someone else must have disguised as her and committed the crime. | ||
}} | }} | ||
| + | |||
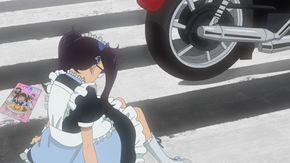
| + | {{InfoBox Crime | ||
| + | | crime = Reckless endagerment | ||
| + | | image = EP1183 Case2.jpg | ||
| + | | victim = Yukari Suda | ||
| + | | cause-death = Hit by a motorcycle | ||
| + | | cause-death-label = Consequence | ||
| + | | suspects = The same person who committed the murder | ||
| + | | description = On the way to escape from the scene, the culprit accidentally hit the café maid, causing her to fall | ||
| + | }} | ||
| + | |||
=== People === | === People === | ||
| Line 105: | Line 116: | ||
=== Resolution === | === Resolution === | ||
<spoiler> | <spoiler> | ||
| − | The police bring the café maid to the interrogation room but without the maid uniform to confirm if Haruko Nagisa was the one to hit her. Nagisa counters this as the maid couldn’t see the face of the culprit when they are wearing the helmet. This is the evidence to proof that Nagisa is the culprit of the murder, as the day of the murder coincides with the opening day of the café, meaning that only a few should be able to recognize the girl as the maid without the uniform, while Nagisa is able to recognize her as the maid of the café almost instantly. | + | The police bring the café maid to the interrogation room but without the maid uniform to confirm if Haruko Nagisa was the one to hit her. Nagisa counters this as the maid couldn’t see the face of the culprit when they are wearing the helmet. This is the evidence to proof that '''Haruko Nagisa''' is the culprit of the murder, as the day of the murder coincides with the opening day of the café, meaning that only a few should be able to recognize the girl as the maid without the uniform, while Nagisa is able to recognize her as the maid of the café almost instantly. |
The murder then is revealed to be just an overreaction, as Nagisa thought that the victim knew everything about the accident caused by her, but in reality, he was just impressed by her reaction to the line, and did not know that she was the one causing the accident that inspires the film in production. | The murder then is revealed to be just an overreaction, as Nagisa thought that the victim knew everything about the accident caused by her, but in reality, he was just impressed by her reaction to the line, and did not know that she was the one causing the accident that inspires the film in production. | ||
| Line 111: | Line 122: | ||
{{InfoBox Crime | {{InfoBox Crime | ||
| crime = Accident (past) | | crime = Accident (past) | ||
| − | | image = EP1183 | + | | image = EP1183 Case3.jpg |
| time = Nagisa's second summer of her high school | | time = Nagisa's second summer of her high school | ||
| cause-death = A person died | | cause-death = A person died | ||
| Line 117: | Line 128: | ||
| suspects = Haruko Nagisa | | suspects = Haruko Nagisa | ||
| suspects-label = Culprit | | suspects-label = Culprit | ||
| − | | description = Yusuke Kawashima wrote a script that based on the accident, but he did not know that Nagisa was the one responsible for the | + | | description = Yusuke Kawashima wrote a script that based on the accident, but he did not know that Nagisa was the one responsible for the accident |
}} | }} | ||
</spoiler> | </spoiler> | ||
Revision as of 03:26, 30 November 2025
| ‹ Arrest That Face | List of Episodes | The Red-Brick Warehouse and the Vanishing Kidnapper › |
| Episode 1183 (Int. Episode 1241) | |||
| Title: | The Interrogation Room 3 | ||
|---|---|---|---|
| Japanese title: | ザ・取調室 (Za・Torishirabeshitsu Surī) | ||
| Original airdate: | November 29, 2025 | ||
| Filler case: | #452 | ||
| Season: | 30 | ||
| Manga source: | TV Original | ||
| Cast: | Conan Edogawa Kogoro Mouri Juzo Megure Wataru Takagi Miwako Sato Yoko Okino | ||
| Case solved by: | Kogoro Mouri (via Conan) | ||
| Next Conan's Hint: | Maid | ||
| Director: | Yasuichiro Yamamoto Nobuharu Kamanaka | ||
| Screenplay: | Toshimichi Okawa | ||
| Storyboard: | Mitsuko Kase | ||
| Episode director: | Kota Nakamura | ||
| Animation director: | Kenichi Otomo Marie Nagano Yui Ushinohama FALCO Suzuki | ||
| Character design: | Masatomo Sudo Rei Masunaga (sub-character) Hiroshi Ogawa (design works) | ||
| |||
| Opening song: | Poker Face | ||
| Closing song: | Fun! Fun! Fun! | ||
The Interrogation Room 3 (ザ・取調室
Contents
Cast
Gadgets
Gadgets
Case
Situation
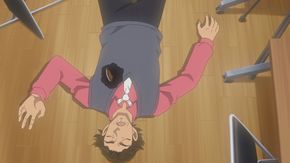
Murder
Victim: Yusuke Kawashima
Age: 45 years old
Method: Stabbed to death
Suspects: Haruko Nagisa (main suspect), Miyuki Jono, Akito Kuboreda
At first when Nagisa was requested to follow the police, she admitted the crime. But in the interrogation room, she denies it. This raises the suspicion that someone else must have disguised as her and committed the crime.
Reckless endagerment
People
Resolution
Trivia
- The maid cafe employee's name, Yukari Suda, is only known through ending credit.
Gallery
In other languages
References
See also
| Episodes of Season 30 | ||
|---|---|---|
| Episode 1148 • 1149 • 1150 • 1151 • 1152 • 1153 • 1154 • 1155 • 1156 • 1157 • 1158 • 1159 • 1160 • 1161 • 1162 • 1163 • 1164 • 1165 • 1166 • 1167 • 1168 • 1169 • 1170 • 1171 • 1172 • 1173 • 1174 • 1175 • 1176 • 1177 • 1178 • 1179 • 1180 • 1181 • 1182 • 1183 • 1184 • 1185 • 1186 |


