The Interrogation Room 3: Difference between revisions
mNo edit summary |
Destub the page. It's confirmed that the police inspected from multiple security camera. |
||
| Line 1: | Line 1: | ||
{{InfoBox TV | {{InfoBox TV | ||
| episode = 1183 | | episode = 1183 | ||
| Line 42: | Line 41: | ||
{{char|Yoko Okino|display=Yoko Okino (balloon)}} | {{char|Yoko Okino|display=Yoko Okino (balloon)}} | ||
}} | }} | ||
== Gadgets == | == Gadgets == | ||
| Line 51: | Line 49: | ||
== Case == | == Case == | ||
=== Situation === | === Situation === | ||
{{InfoBox Crime | {{InfoBox Crime | ||
| Line 61: | Line 58: | ||
| cause-death = Stab wound to the chest | | cause-death = Stab wound to the chest | ||
| suspects = Haruko Nagisa, Miyuki Jono, and Akito Kubodera | | suspects = Haruko Nagisa, Miyuki Jono, and Akito Kubodera | ||
| description = | | description = Previously, when Nagisa was asked by Takagi and Sato to come with them, she admitted that she killed Kawashima. In the interrogation room, however, she denies the crime and claims she admitted the crime under pressure from the police. | ||
}} | }} | ||
Yusuke Kawashima held an audition the previous day where whoever passed would get to co-star with Miyuki Jono. Just some hours ago, someone got inside and murdered him, then got away on their motorcycle and nearly hit a café maid on their run. Assistant film director Akito Kubodera ran into the culprit when they were getting away, and found their appearance identical to one of the auditors, Haruko Nagisa. Kubodera’s testimony was strengthened via security camera footage during the reckless endangerment the police collected and testimony from nearby civilians. Unfortunately, he was the only one to see the culprit’s face since they wore a motorcycle helmet on their run. | |||
{{InfoBox Crime | {{InfoBox Crime | ||
| Line 73: | Line 70: | ||
| cause-death-label = Consequence | | cause-death-label = Consequence | ||
| suspects = Haruko Nagisa, Miyuki Jono, and Akito Kubodera | | suspects = Haruko Nagisa, Miyuki Jono, and Akito Kubodera | ||
| description = | | description = The culprit nearly hit the café maid on their way to escape the scene. | ||
}} | }} | ||
When Takagi and Sato asked her to come with them for questioning, she simply admitted that she killed Kawashima without explaining the motive, so she was taken to the interrogation room 3 for further investigation. Kogoro and Conan are also present at her interrogation because Kawashima was Kogoro’s client. This time, Nagisa denies her crime and claims that she admitted the crime under pressure. Meanwhile, Kogoro and Conan have watched the footage and point out some differences between Nagisa’s appearance and the culprit’s. Megure proposes the theory that someone must have disguised to be like Nagisa and committed the crime, to which Kogoro strengthens by mentioning that Kawashima asked him to investigate Jono. In fact, Kawashima revealed to the detective that they were dating, only for Kogoro to discover Jono’s affair with Kubodera. | |||
There are some confusions that delay the investigation: | |||
* Nagisa finally reveals that she had an alibi around the time Kawashima died: She was resting on a bench at Meryl park when a total of two women passed by her – one carrying a dog while the other was taking her daughter along. Takagi, Kogoro, and Conan arrive at the said bench to retrieve the camera footage, and find her words to be correct. However, Conan disapproves this to be a legit alibi because he found tape residue under the said bench. | |||
* Some differences between Nagisa’s appearance and the culprit’s are from their personal watches and hair color (the culprit’s hair color is darker than Nagisa’s). The wig with the same color as the culprit was found at Jono’s apartment, which could imply she was the culprit. However, she is currently in the hospital with Kubodera owing to the shock of the murder. | |||
To this point, Conan thinks of the witness(es) that he can manipulate to help with the case, but cannot be used to form a false alibi. | |||
=== People === | === People === | ||
| Line 121: | Line 115: | ||
=== Resolution === | === Resolution === | ||
<spoiler> | <spoiler> | ||
Following Conan’s request, the café maid that almost got hit earlier is brought in the scene, without the maid outfit. The atmosphere is quiet until Nagisa bursts into laughter as she recognizes the girl to be the café maid, and that she must be instructed by the police to falsely accuse her as the culprit since no one saw the culprit’s face aside from Kubodera. The sleeping Kogoro reveals that the day the murder occurs is, in fact, the opening day of the café the said girl was working at, and that the girl stopped working at the café after the said incident, so the only possible explanation for how Nagisa recognizes the face is that she was the one riding the motorcycle that almost hit the girl. | |||
The | The reason she murdered Kawashima was because he smiled at her reaction during her turn at the audition, in which she was shown a picture of an accident that she caused during her second summer of high school. However, it is revealed that the accident inspired him to make the film, and that he did not know Nagisa was the one causing the accident. | ||
{{InfoBox Crime | {{InfoBox Crime | ||
Revision as of 13:59, 16 October 2026
(Int. Episode 1241)

(Za・Torishirabeshitsu Surī)
Rikiya Koyama as Kogoro Mouri
Wataru Takagi as Wataru Takagi
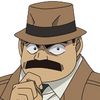
Chafurin as Juzo Megure
Atsuko Yuya as Miwako Sato
Yuki Tai as Yusuke Kawashima
Rumi Kasahara as Miyuki Jono
Aya Suzaki as Yukari Suda
Takehisa Hirose as Akito Kubodera
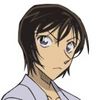
Sora Amamiya as Haruko Nagisa
The Interrogation Room 3 (ザ・取調室
Cast




Gadgets

Case
Situation

Yusuke Kawashima held an audition the previous day where whoever passed would get to co-star with Miyuki Jono. Just some hours ago, someone got inside and murdered him, then got away on their motorcycle and nearly hit a café maid on their run. Assistant film director Akito Kubodera ran into the culprit when they were getting away, and found their appearance identical to one of the auditors, Haruko Nagisa. Kubodera’s testimony was strengthened via security camera footage during the reckless endangerment the police collected and testimony from nearby civilians. Unfortunately, he was the only one to see the culprit’s face since they wore a motorcycle helmet on their run.

When Takagi and Sato asked her to come with them for questioning, she simply admitted that she killed Kawashima without explaining the motive, so she was taken to the interrogation room 3 for further investigation. Kogoro and Conan are also present at her interrogation because Kawashima was Kogoro’s client. This time, Nagisa denies her crime and claims that she admitted the crime under pressure. Meanwhile, Kogoro and Conan have watched the footage and point out some differences between Nagisa’s appearance and the culprit’s. Megure proposes the theory that someone must have disguised to be like Nagisa and committed the crime, to which Kogoro strengthens by mentioning that Kawashima asked him to investigate Jono. In fact, Kawashima revealed to the detective that they were dating, only for Kogoro to discover Jono’s affair with Kubodera.
There are some confusions that delay the investigation:
- Nagisa finally reveals that she had an alibi around the time Kawashima died: She was resting on a bench at Meryl park when a total of two women passed by her – one carrying a dog while the other was taking her daughter along. Takagi, Kogoro, and Conan arrive at the said bench to retrieve the camera footage, and find her words to be correct. However, Conan disapproves this to be a legit alibi because he found tape residue under the said bench.
- Some differences between Nagisa’s appearance and the culprit’s are from their personal watches and hair color (the culprit’s hair color is darker than Nagisa’s). The wig with the same color as the culprit was found at Jono’s apartment, which could imply she was the culprit. However, she is currently in the hospital with Kubodera owing to the shock of the murder.
To this point, Conan thinks of the witness(es) that he can manipulate to help with the case, but cannot be used to form a false alibi.
People


Resolution


Trivia
- The maid cafe employee's name, Yukari Suda, is only known through the ending credits.
- Meryl Park may be a reference to American actress Meryl Streep.
Gallery
In other languages
| Language | Title | Translation |
|---|---|---|
 Arabic Arabic |
غرفة الاستجواب الثالثة | Interrogation room 3 |
 French (Subbed) French (Subbed) |
La Salle d'interrogatoire 3 (trois) | The Interrogation room 3 |
 German (Subbed) German (Subbed) |
Im Verhörraum 3 | In Interrogation Room 3 |
 Thai Thai |
ห้องสอบสวน 3 | Interrogation Room 3 |
See also
 Season 30 (2025) Season 30 (2025)
| ||
|---|---|---|
|
#1152:
#1161:
#1173: #1176:
#1177:
#1181:
#1182:
#1183:
#1186: | ||
| Yellow background = TV Original | ||
| « Season 29 | List of episodes | Season 31 » |