Difference between revisions of "The Interrogation Room 3"
m (typo) |
(→Case) |
||
| Line 55: | Line 55: | ||
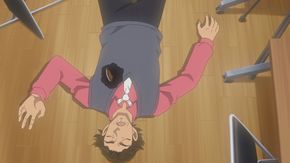
| crime = Murder | | crime = Murder | ||
| image = EP1183 Case1.jpg | | image = EP1183 Case1.jpg | ||
| − | | location = | + | | location = Kawashima's apartment |
| victim = Yusuke Kawashima | | victim = Yusuke Kawashima | ||
| age = 45 years old | | age = 45 years old | ||
| cause-death = Stab wound to the chest | | cause-death = Stab wound to the chest | ||
| − | | suspects = Haruko Nagisa, Miyuki Jono | + | | suspects = Haruko Nagisa, Miyuki Jono and Akito Kubodera |
| description = At first when Nagisa was requested to follow the police, she admitted the crime. But in the interrogation room, she denies it. This raises the suspicion that someone else must have disguised as her and committed the crime. | | description = At first when Nagisa was requested to follow the police, she admitted the crime. But in the interrogation room, she denies it. This raises the suspicion that someone else must have disguised as her and committed the crime. | ||
}} | }} | ||
| Line 71: | Line 71: | ||
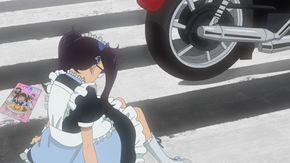
| cause-death = Hit by a motorcycle | | cause-death = Hit by a motorcycle | ||
| cause-death-label = Consequence | | cause-death-label = Consequence | ||
| − | | suspects = | + | | suspects = Haruko Nagisa, Miyuki Jono and Akito Kubodera |
| − | |||
| description = On the way to escape from the scene, the culprit accidentally hit the café maid, causing her to fall. <!-- However, it is still unknown why the police were able to confirm that the two cases were from a same person. --> | | description = On the way to escape from the scene, the culprit accidentally hit the café maid, causing her to fall. <!-- However, it is still unknown why the police were able to confirm that the two cases were from a same person. --> | ||
}} | }} | ||
| Line 81: | Line 80: | ||
There are some confusions in the investigation that make this case unsolved for now: | There are some confusions in the investigation that make this case unsolved for now: | ||
| − | * The evidence that Nagisa saw a woman with her dog and a woman with her daughter while having a break at the | + | * The evidence that Nagisa saw a woman with her dog and a woman with her daughter while having a break at the Meryl Park’s bench can be refuted, as Conan found tape marks suggesting that she might have attached a camera under the bench to observe people passing by and use it as a false alibi. This may explain why she can remember the details with such amazing accuracy. Kogoro with his love of beauty harshly denies this and grabs Conan, much to Megure’s discomfort. |
* The wig and the motorcycle that the culprit used are found near Jono’s apartment, this could imply that she was the one behind the murder. However, she is reported to be in the hospital along with Kubodera after the shock of the murder. This could imply that Jono couldn't be the murder, despite being a star actress? | * The wig and the motorcycle that the culprit used are found near Jono’s apartment, this could imply that she was the one behind the murder. However, she is reported to be in the hospital along with Kubodera after the shock of the murder. This could imply that Jono couldn't be the murder, despite being a star actress? | ||
| Line 101: | Line 100: | ||
{{People|Yukari Suda|Yukari Suda.jpg| | {{People|Yukari Suda|Yukari Suda.jpg| | ||
* Victim (motorcycle hit - survived) | * Victim (motorcycle hit - survived) | ||
| − | * | + | * Part-time maid café worker}} |
{{People|Akito Kubodera|Akito Kubodera.jpg| | {{People|Akito Kubodera|Akito Kubodera.jpg| | ||
* 35 years old | * 35 years old | ||
| − | * | + | * Assistant film director}} |
{{People|Woman A|Woman A.jpg| | {{People|Woman A|Woman A.jpg| | ||
| − | * | + | * Meryl park visitor |
* Dog owner}} | * Dog owner}} | ||
{{People|Dog|Dog.jpg| | {{People|Dog|Dog.jpg| | ||
| Line 112: | Line 111: | ||
* White Poodle}} | * White Poodle}} | ||
{{People|Girl|Girl.jpg| | {{People|Girl|Girl.jpg| | ||
| − | * | + | * Meryl Park visitor |
* Holding a yellow balloon}} | * Holding a yellow balloon}} | ||
{{People|Woman B|Woman B.jpg| | {{People|Woman B|Woman B.jpg| | ||
| − | * | + | * Meryl park visitor |
* Girl's mother}} | * Girl's mother}} | ||
{{EndBox}} | {{EndBox}} | ||
| Line 129: | Line 128: | ||
| image = EP1183 Case3.jpg | | image = EP1183 Case3.jpg | ||
| time = Nagisa's second summer of her high school | | time = Nagisa's second summer of her high school | ||
| − | | | + | | victim = One unnamed person |
| − | |||
| suspects = Haruko Nagisa | | suspects = Haruko Nagisa | ||
| suspects-label = Culprit | | suspects-label = Culprit | ||
| − | | description = Yusuke Kawashima wrote a script that based on the accident, but he did not know that Nagisa was the one responsible for the accident | + | | description = Yusuke Kawashima wrote a script that was based on the accident, but he did not know that Nagisa was the one responsible for the accident. |
}} | }} | ||
</spoiler> | </spoiler> | ||
Revision as of 03:15, 16 December 2025
| ‹ Arrest That Face | List of Episodes | The Red-Brick Warehouse and the Vanishing Kidnapper › |
| Episode 1183 (Int. Episode 1241) | |||
| Title: | The Interrogation Room 3 | ||
|---|---|---|---|
| Japanese title: | ザ・取調室 (Za・Torishirabeshitsu Surī) | ||
| Original airdate: | November 29, 2025 | ||
| Broadcast rating: | 6.8% | ||
| Filler case: | #452 | ||
| Season: | 30 | ||
| Manga source: | TV Original | ||
| Cast: | Conan Edogawa Kogoro Mouri Juzo Megure Wataru Takagi Miwako Sato Yoko Okino | ||
| Case solved by: | Kogoro Mouri (via Conan) | ||
| Next Conan's Hint: | Maid | ||
| Director: | Yasuichiro Yamamoto Nobuharu Kamanaka | ||
| Screenplay: | Toshimichi Okawa | ||
| Storyboard: | Mitsuko Kase | ||
| Episode director: | Kota Nakamura | ||
| Animation director: | Kenichi Otomo Marie Nagano Yui Ushinohama FALCO Suzuki | ||
| Character design: | Masatomo Sudo Rei Masunaga (sub-character) Hiroshi Ogawa (design works) | ||
| |||
| Opening song: | Poker Face | ||
| Closing song: | Fun! Fun! Fun! | ||
The Interrogation Room 3 (ザ・取調室
Contents
Cast
Gadgets
Case
Situation
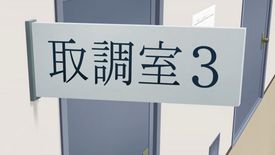
In the interrogation number 3, Detective Sato and Detective Takagi are interrogating Haruko Nagisa, who surprisingly denies committing the murder that she previously admitted to when was requested to follow the police.
The victim is Yusuke Kawashima, one of Kogoro’s clients. The culprit stabbed Kawashima when he was checking the casting alone, and they ran away in a motorcycle that hit the café maid. The café maid couldn’t see the face of the culprit because of the helmet they were wearing.
Akito Kubodera happened to see the appearance of the culprit looking only identical to Nagisa, and based on the camera footage that caught the culprit along with their motorcycle, it appears at the first glance that someone must have disguised as Nagisa, and committed the murder to frame her. Everyone seems to be convinced with this theory, except for Sato and Conan, with Sato having watched the casting video and noticed Nagisa’s somewhat unusual expression while Conan thinking that Nagisa could have just made another cheap copy of herself.
Kogoro's suspicion raises toward Miyuki Jono, whom Kawashima requested Kogoro to investigate, as he discovered that she was also dating Kubodera in secret.
There are some confusions in the investigation that make this case unsolved for now:
- The evidence that Nagisa saw a woman with her dog and a woman with her daughter while having a break at the Meryl Park’s bench can be refuted, as Conan found tape marks suggesting that she might have attached a camera under the bench to observe people passing by and use it as a false alibi. This may explain why she can remember the details with such amazing accuracy. Kogoro with his love of beauty harshly denies this and grabs Conan, much to Megure’s discomfort.
- The wig and the motorcycle that the culprit used are found near Jono’s apartment, this could imply that she was the one behind the murder. However, she is reported to be in the hospital along with Kubodera after the shock of the murder. This could imply that Jono couldn't be the murder, despite being a star actress?
Suddenly, Conan thinks of another witness that might help on the case but couldn’t be used to form a false alibi, who could they be?
People
Resolution
Trivia
- The maid cafe employee's name, Yukari Suda, is only known through ending credit.
Gallery
In other languages
| Language | Title | Translation |
|---|---|---|
| La Salle d'interrogatoire 3 (trois) | The Interrogation room 3 | |
| Im Verhörraum 3 | In Interrogation Room 3 |
References
See also
| Episodes of Season 30 | ||
|---|---|---|
| Episode 1148 • 1149 • 1150 • 1151 • 1152 • 1153 • 1154 • 1155 • 1156 • 1157 • 1158 • 1159 • 1160 • 1161 • 1162 • 1163 • 1164 • 1165 • 1166 • 1167 • 1168 • 1169 • 1170 • 1171 • 1172 • 1173 • 1174 • 1175 • 1176 • 1177 • 1178 • 1179 • 1180 • 1181 • 1182 • 1183 • 1184 • 1185 • 1186 |


