The Scar that Evokes the Past/Gallery: Difference between revisions
No edit summary |
No edit summary |
||
| Line 7: | Line 7: | ||
Image:5.png|Morimura showing his police badge to the killer | Image:5.png|Morimura showing his police badge to the killer | ||
Image:4.png|Takagi blushing | Image:4.png|Takagi blushing | ||
File:EP534-9.jpg|Sato in the hot spring (zoom on her chest)... | |||
File:EP534-10.jpg|Plunging hand in water... | |||
File:EP534-11.jpg|Washing her hair... | |||
File:EP534-12.jpg|And her neck | |||
File:EP534-Sato.jpg|It was in fact a memory as the miror broke | |||
Image:3.png|Why are those kids there in Takagi's car! | Image:3.png|Why are those kids there in Takagi's car! | ||
Image:TV Episode 535.jpg|The Detective Boys secretly watching as Sato kisses Takagi | Image:TV Episode 535.jpg|The Detective Boys secretly watching as Sato kisses Takagi | ||
| Line 13: | Line 18: | ||
Image:9.png|Doji Hiramune vs. Tsuguharu Bokawa | Image:9.png|Doji Hiramune vs. Tsuguharu Bokawa | ||
Image:10.png|Atsunori Mugita in background | Image:10.png|Atsunori Mugita in background | ||
</gallery> | </gallery> | ||
Revision as of 13:43, 2 December 2018
This is a gallery of images for the episode: The Scar that Evokes the Past.
-
Hiramune's dying message
-
Takagi commenting Haibara's displaced quote
-
Matsumoto remembers
-
Morimura showing his police badge to the killer
-
Takagi blushing
-
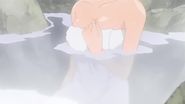 Sato in the hot spring (zoom on her chest)...
 -
 Plunging hand in water...
 -
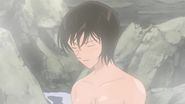
 Washing her hair...
 -
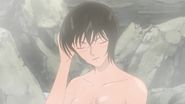
 And her neck
 -
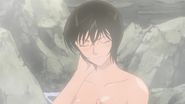
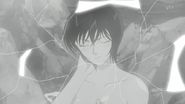 It was in fact a memory as the miror broke
 -
Why are those kids there in Takagi's car!
-
 The Detective Boys secretly watching as Sato kisses Takagi
 -
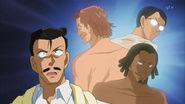 Kogoro surprised when he sees that all three people including Taisuke Hoya, Ryuhei Kusumoto, Sogo Banba have a scar
 -
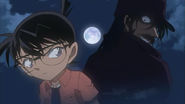 Conan and the serial killer under the moon
 -
Doji Hiramune vs. Tsuguharu Bokawa
-
Atsunori Mugita in background


