Holmes' Revelation/Gallery: Difference between revisions
Ushiwakamaru (talk | contribs) - sub eng |
No edit summary |
||
| (One intermediate revision by one other user not shown) | |||
| Line 1: | Line 1: | ||
{{Needs image}} | |||
This is a gallery of images for the episode: [[Holmes' Revelation]]. | This is a gallery of images for the episode: [[Holmes' Revelation]]. | ||
== Screenshots == | |||
<gallery widths=180px perrow=5> | <gallery widths=180px perrow=5> | ||
Image:vlcsnap-2013-11-13-20h33m25s60.png| | |||
Image:vlcsnap-2013-11-13-20h36m40s254.png| | |||
Image:Shinichi and Ran EP616.jpg| | Image:Shinichi and Ran EP616.jpg| | ||
Image:vlcsnap-2013-11-13-20h37m41s86.png| | |||
Image:vlcsnap-2013-11-13-20h40m10s51.png| | |||
Image:Shinichi Kudo EP616.jpg| | Image:Shinichi Kudo EP616.jpg| | ||
Image:vlcsnap-2013-11-13-20h44m08s111.png| | |||
Image:vlcsnap-2013-11-13-20h49m51s215.png| | |||
Image:Shinichi and Ran EP617 (1).jpg| | Image:Shinichi and Ran EP617 (1).jpg| | ||
Image:Shinichi and Ran EP617 (2).jpg| | Image:Shinichi and Ran EP617 (2).jpg| | ||
| Line 9: | Line 17: | ||
Image:Ran Mad EP617 (1).jpg| | Image:Ran Mad EP617 (1).jpg| | ||
Image:Ran Mad EP617 (2).jpg| | Image:Ran Mad EP617 (2).jpg| | ||
Image:Ran Mad EP617 (3).jpg| | |||
Image:vlcsnap-2013-11-13-20h52m43s158.png| | Image:vlcsnap-2013-11-13-20h52m43s158.png| | ||
Image:vlcsnap-2013-11-13-20h53m17s242.png| | |||
Image:vlcsnap-2013-11-13-20h54m16s64.png| | |||
Image:vlcsnap-2013-11-13-20h56m12s191.png| | |||
Image:vlcsnap-2013-11-13-20h56m37s162.png| | |||
Image:vlcsnap-2013-11-13-20h58m25s200.png| | |||
Image:vlcsnap-2013-11-13-21h03m11s250.png| | Image:vlcsnap-2013-11-13-21h03m11s250.png| | ||
Image:vlcsnap-2013-11-13-21h05m00s73.png| | |||
Image:vlcsnap-2013-11-13-21h05m28s121.png| | |||
Image:vlcsnap-2013-11-13-21h07m45s219.png| | |||
Image:vlcsnap-2013-11-13-21h08m05s147.png| | |||
Image:vlcsnap-2013-11-13-21h14m24s109.png| | |||
Image:vlcsnap-2013-11-13-21h18m54s238.png| | |||
Image:vlcsnap-2013-11-13-21h24m19s167.png| | |||
Image:vlcsnap-2013-11-13-21h24m27s245.png| | Image:vlcsnap-2013-11-13-21h24m27s245.png| | ||
Image:vlcsnap-2013-11-13-21h48m36s155.png| | Image:vlcsnap-2013-11-13-21h29m13s21.png| | ||
Image:Shinichi and ran.jpg| | Image:vlcsnap-2013-11-13-21h30m15s149.png| | ||
Image:vlcsnap-2013-11-13-21h31m00s86.png| | |||
Image:vlcsnap-2013-11-13-21h31m26s86.png| | |||
Image:vlcsnap-2013-11-13-21h32m14s43.png| | |||
Image:vlcsnap-2013-11-13-21h33m58s72.png| | |||
Image:vlcsnap-2013-11-13-21h36m40s144.png| | |||
Image:EP619 Case 5.png|The building is exploded from Hades | |||
Image:vlcsnap-2013-11-13-21h43m33s180.png|Hades mad from the past | |||
Image:vlcsnap-2013-11-13-21h46m17s44.png| | |||
Image:vlcsnap-2013-11-13-21h48m36s155.png|Conan Strike the culprit | |||
Image:vlcsnap-2013-11-13-21h49m03s172.png| | |||
Image:vlcsnap-2013-11-13-21h50m25s206.png| | |||
Image:vlcsnap-2013-11-13-21h51m53s44.png| | |||
Image:vlcsnap-2013-11-13-21h52m17s33.png| | |||
Image:vlcsnap-2013-11-13-21h52m30s192.png| | |||
Image:vlcsnap-2013-11-13-21h52m47s97.png| | |||
Image:vlcsnap-2013-11-13-21h54m02s75.png| | |||
Image:vlcsnap-2013-11-13-21h55m03s171.png| | |||
File:Shinichi and ran.jpg| | |||
File:Ran upon hearing Shinichi's confession.jpg| | |||
File:Shinichi finally confesses.jpg| | |||
File:Shinichi Confesses.jpg| | |||
File:Shinichi and Ran EP621.jpg| | |||
Image:vlcsnap-2013-11-13-21h55m35s240.png| | |||
Image:vlcsnap-2013-11-13-21h56m10s90.png| | |||
Image:vlcsnap-2013-11-13-21h57m07s135.png| | Image:vlcsnap-2013-11-13-21h57m07s135.png| | ||
File:Yusaku Kudo Profile.jpg| | |||
File:Apollo Glass Profile.jpg| | |||
File:Yukiko Kudo Profile.jpg| | |||
</gallery> | </gallery> | ||
Latest revision as of 23:56, 5 February 2026
|
This gallery requires new images. They are either missing, low-quality, language-subbed or not ordered chronologically. Please consider adding new images or updating the ones in this gallery page, if you are able. |
This is a gallery of images for the episode: Holmes' Revelation.
Screenshots
-
-

-

-
-
-
-
-
-
-

-
-
-
-
-

-
-
-
-
-
-

-
-
-
-
-
-
-

-

-
-
-

-
-
-

-
-
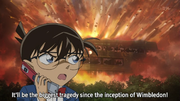 The building is exploded from Hades
 -
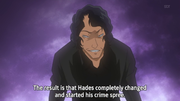
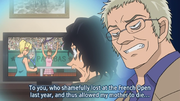 Hades mad from the past
 -
-
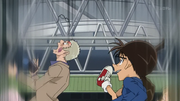 Conan Strike the culprit
 -
-
-
-
-

-
-
-

-

-
-

-

-
-
-

-
-

-

-


.jpg)
.jpg)
.jpg)
.jpg)
.jpg)
.jpg)


