Difference between revisions of "The Scar that Evokes the Past/Gallery"
From Detective Conan Wiki
| Line 1: | Line 1: | ||
This is a gallery of images for the episode: [[The Scar that Evokes the Past]]. | This is a gallery of images for the episode: [[The Scar that Evokes the Past]]. | ||
| − | <gallery widths= | + | <gallery widths=185px perrow=5> |
Image:8.png|Hiramune's dying message | Image:8.png|Hiramune's dying message | ||
Image:7.png|Takagi commenting Haibara's displaced quote | Image:7.png|Takagi commenting Haibara's displaced quote | ||
| Line 19: | Line 19: | ||
File:EP534-Sato.jpg|It was in fact a memory as the miror broke | File:EP534-Sato.jpg|It was in fact a memory as the miror broke | ||
</gallery> | </gallery> | ||
| − | == See | + | |
| + | == See also == | ||
* [[The Scar that Evokes the Past]] | * [[The Scar that Evokes the Past]] | ||
| + | |||
[[Category:Case galleries]] | [[Category:Case galleries]] | ||
Revision as of 12:19, 2 December 2018
This is a gallery of images for the episode: The Scar that Evokes the Past.
- 8.png
Hiramune's dying message
- 7.png
Takagi commenting Haibara's displaced quote
- 6.png
Matsumoto remembers
- 5.png
Morimura showing his police badge to the killer
- 4.png
Takagi blushing
- 3.png
Why are those kids there in Takagi's car!

The Detective Boys secretly watching as Sato kisses Takagi
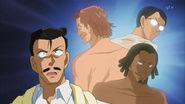
Kogoro surprised when he sees that all three people including Taisuke Hoya, Ryuhei Kusumoto, Sogo Banba have a scar
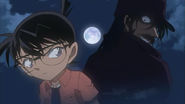
Conan and the serial killer under the moon
- 9.png
Doji Hiramune vs. Tsuguharu Bokawa
- 10.png
Atsunori Mugita in background
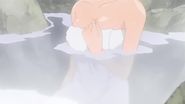
Sato in the hot spring (zoom on her chest)...
Plunging hand in water...
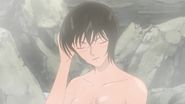
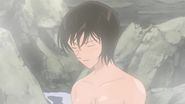
Washing her hair...
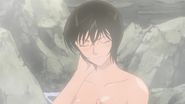
And her neck
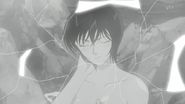
It was in fact a memory as the miror broke


